How to Fix a Leaking Garbage Disposal
A garbage disposal unit is one of the significant investments a homeowner should undertake without any qualms. This device is installed under a kitchen sink between the trap and sink drain. It is used to shred food waste into small pieces that can pass through the plumbing system.
Household waste is usually a problematic component that creates a lot of public health outcry, municipal waste problem, and sanitation problems. For any homestead or business premises to properly dispose of waste, the waste disposal units should be working fittingly.
Kitchen waste also creates environmental problems. This is possible as the disposal units increase the amount of carbon that reaches the waste treatment plants, which increases the consumption of oxygen. A garbage disposer should, always be in the best condition and working 100%.
Why Garbage Disposal Unit is Leaking
A leaking waste disposal unit can be quite intimidating and frustrating. A leaking garbage disposer unit will make the floor or cabinet under the skin wet and cause unexpected damage. Such an issue can also lead to other costly water damages a homeowner does not fix the problem immediately.
If a homeowner has the skill sets and experience to DIY garbage disposal unit, he or she can handle the problem hassle-free. If stuck and do not know where to start. It is advisable to leave the task to professionals, and it is rewarding to work with a plumbing company.
A professional will do anything possible to leave a waste disposal unit working correctly. Have a look:
Worn Out Gaskets – Consider checking the gaskets of the kitchen sink found between the rubber seal and the flange. Any discharge from these parts means the gasket is defective and needs repair or replacement. If a homeowner has been using gaskets for many years, they might become weak and start to drip. And if one does not use the garbage disposer occasionally, it might dry up and leak in turn.
Leaky Sink Flange – This section is where the sink and drain meet, and the flange helps dirt from blocking up the kitchen drain. The flange can be defective if the flange is weak putty or loose mounting bolts. A homeowner can consider replacing the putty or unscrew the bolt until he or she notices the gap causing problems.
Loose Drain Lines – Garbage units can leak from the drain lines, and it is easy to notice this problem by checking the spot where the unit meets the lines.
Loose Pipes or Seals – Check under the sink to find these parts, and they may be leaking if someone accidentally hits the disposal pipes. One might also push the pipes or seals away from their original position.
Cracked Body or Split – If one has just replaced a leaking gasket and noticed a discharge, there is a possibility of large cracks on the surface. Most ruptures occur from bumps or knocks while a homeowner is retrieving items near the garbage unit.
Leaking Reset Button – If a garbage unit is old, there is a likelihood it will leak from the rest button. To fix this issue, buy a new button.
Damaged Discharge Pipe – Inspect the discharge pipe that is fixed to the sink and here is fore tear and wear. Check for loose plumbing as it is the root of most leaking garbage disposal unit problems.
Fixing a Leaking Garbage Disposal-What to Know
A homeowner who does not want to seek services of a plumbing company in Fairfax VA, and understands what it takes to fix a leak; he or she is among the lucky few. If he or she can DIY a leaking waste disposal unit, there are essential steps or procedures to follow and succeed in these endeavors.
1. Start by Preparing and Investigate the Leak
Start by unplugging the unit from the wall outlet and turn off the power and prevent possible electrical shock. Insert a watertight sink stopper and prevent any water from running down the drain. Wipe the unit dry with a clean cloth and clean it any debris.
Using a torch or flashlight, inspect the disposal unit after pouring colored water into the unit for any leaks. It is easy to notice leaks from different parts of the unit. They include:
The top where the unit meets the sink drain.
The sides where the main drainpipe or dishwasher hose connects to the unit.
The bottom of the entire garbage disposal unit.
Inspect all these locations and find the central spot of the leak. Leaks on the top of the unit are easy to notice as they show up when the sink is plugged. Side and bottom leaks will show up when the sink is unplugged.
2. Fix a Leaking Garbage Disposal at Flange
Start by unplugging the garbage disposal from the power source. Go on and loosen the dishwasher drain hose from the unit. This involves loosening the clamp and unscrewing the screws with a flathead screwdriver.
Remove the flange by pushing it from underneath the sink and pull it out through the top of the sink. Try and scrape off all excess and old putty from the sink and flange.
Reseal the flange with a generous amount of plumber’s putty and around the rim of the flange. Go on and push the flange back to position and tighten the screws around the unit and lock the garbage disposer back to the original position. Reconnect the system and test whether it is still leaking.
3. Replace the Gasket
Remove the gasket and replace it and keep the entire system working correctly. Disconnect the drain and unplug the cord from the garbage disposal. Remove the dishwasher from the system and unlock the unit.
Remove the old gasket and put a new one in the same place. Ensure the unit pops into the lip of the system and sits flat. Reconnect all the drains and test it for leaks.
4. Fixing Parts Causing the Unit to Leak
Check the whole system and fix loose drain lines and check for wear and tear. Use a new roll of the putty sealing ring for loose seals and tighten the bolts at the leaky spots. If the leak is from dishwasher connection, secure and replace the hose if it is old or worn out.
5. Know What Not to Pour Down the Garbage Disposal
There is no better way to solve problems with a garbage disposer than knowing what to put down the drain or not. Do not pour down the following:
Pasta, rice, and bread
Coffee grounds
Animal bones
Seeds, nuts, and shells
Stringy fruits and vegetables
Grease, fat, and oil
Seek Professional Help to Solve Garbage Disposal Leakage
For homeowners who cannot DIY and fix leakage, its best to seek professional help to solve garbage disposer leakage issues. To rest assured of top-notch plumbing assistance, work with a reputed plumbing company. Ensure the company hires well-trained, experienced, and competent plumbers.
Interview the available plumbers and pick the best for the project at hand. Pick licensed, insured, and trustworthy plumbers well-acquainted with plumbing problems. Go and contact the available plumbers and schedule an appointment or request a plumbing estimate.

5 Reasons Why You Need To Replace The Plumbing In Your House
The plumbing network is a silent network of soldiers that helps to keep you and your family members fresh and sweet smelling. According to research the ordinary person in homes spend around 60 to 120 minutes on their washroom, toilets, and bathrooms. Man, women, and men spend quite a bit of time in the kitchen washing their utensils and for other purposes including cooking. Hence, it is important to ensure that the plumbing network in your home in the best of condition. However, as our home ages, it is obvious that the plumbing network will also see some damages and wear and tear. While regular repairing, upkeep and maintenance may help prolong the life of the piping and plumbing system, there could be times when the plumbing system may need replacement, either partially or fully.
However, the whole plumbing network of the home will not come crashing down overnight unless there is a big natural disaster like storm, tsunami, or big fire. In this article, we will be looking at those classic signs and symptoms that could be pointing towards a failing and crumbling plumbing system. It would always be advisable to seek the counsel and advice of experienced plumber repair service Chantilly VA professionals. They will be able to offer proactive services that could help preempt costly and expensive replacements of the entire plumbing services. However, it would be interesting to have a look at those early symptoms that could point to the damage of the plumbing network. Usually, the damage starts from one place and it slowly spreads to the entire plumbing network.
We are listing down a few of the signs that could be ominous and could mean that the plumbing system could be falling apart if remedial action is not taken immediately.
1. Old Piping & Plumbing System
You may feel that your plumbing work is quite fine and doing well. However, like all fixtures and fittings, there is no doubt that plumbing networks also have a certain span of life.
Beyond which they will not be able to pull on. Therefore, you must consider the age of the plumbing network and the years in which they were constructed. For example, plumbing pipes constructed before the 1960s used galvanized steel and these tend to clog and corrode with time. Many homes also have used blue and grey polybutylene piping and they are also not free from problems. You can be sure that these types of piping systems are unreliable. Therefore, as a rule of the thumb, it would be better to regularly check plumbing networks that are more than 40 to 50 years old. The best option would be to have these old-style piping systems and plumbing networks replaced by the new ones because of obvious reasons.
2. Frequent Leak
You could also come across situations where you could see that the plumbing networks and pipes develop leaks. While leaks once in five or six years at some isolated place is not a problem, if it keeps happening every year or more than once in a year, then you can be reasonably sure that the particular stretch could be slowly getting damaged. Unless you can identify the location, segregate it and have it replaced with new pipes and plumbing systems, you could end up having a bigger problem. Repairing them repeatedly could be an expensive proposition and beyond a point repairing could turn out to be counterproductive.
3. The Age of the Piping & Plumbing Network

You also should have a clear understanding about the type of pipes you have in your home and the possible and probably lifespan of the same. You should regularly find out the condition of the piping and plumbing systems. It would not be possible for you to do the job and therefore you must take the help and assistance or professionals to do the diagnostic work and also go by the recommendations that they may have to offer. For example, water lines that are made from brass have a lifespan of around 40 to 70 years. Those with galvanized steel last for around 20 to 50 years. Copper water lines may have a life span of roughly around 50 years.
Cast iron and concrete drain lines normally should be good enough for 75 to 100 years. You should try and stay away from Polybutylene and polyvinyl chloride pipelines because they have a lifespan only for around 20 to 30 years. They are also prone to regular damages and regular repairs will also be required.
4. Consider Growth Factors
The growth of trees, plants and undergrowth could also determine the life of your plumbing system. If you have piping and plumbing systems running below your garden and backyard, make sure that they are checked regularly. Roots may cause damages to the same and unless you are regular in checking the same, you could end up facing big damage. It would be a good idea to cut down big trees if they are passing through your piping and plumbing system. A better idea would be to create a separate space for plumbing networks, and it should be away from the garden and backyard where you may have big trees growing and taking root.
5. Staining of Clothes

If you are living in a home with old piping systems using iron and steel, you must be on the lookout for red stains. These are basically corroded pieces of piping systems. If they keep coming out from your faucet on a regular basis, please be sure that there is something wrong with the network and you must have it checked as soon as possible. If needed, do not hesitate in replacing that portion of the plumbing system without which you may end up paying a much bigger price. If you are not sure how to go about it always take the help and assistance of professional plumbers. They have special tools and special ways and means to identify the situation and find the right solution.
We hope that we have been able to give a reasonably good insight into the various aspects of plumbing. The crux of the matter is that it is always better to look for early signs of wear and tear and take proactive action rather than being reactive. If you need any help on plumbing work of any type, please get in touch with us. We are sure we will be able to do what it takes to have the plumbing system inspected, diagnosed and if necessary, we also can replace it.
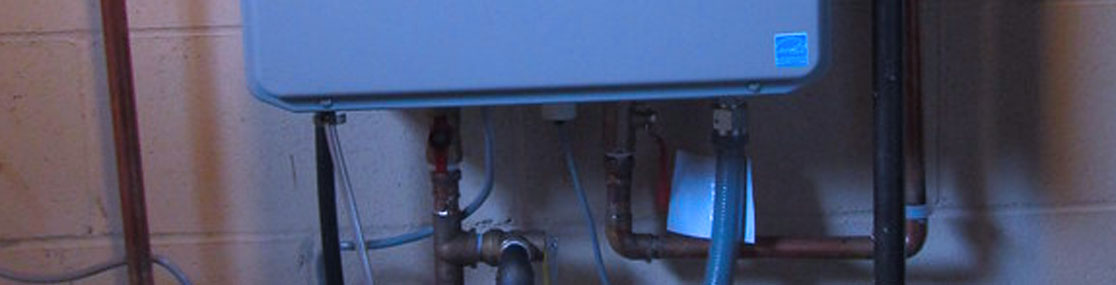
5 Signs to Know When to Replace Your Water Heater
A water heater is one of the fantastic heating systems that a homeowner can invest in and own. Water heating is a procedure that involves warming water for everyday use at home. Many homeowners use different sources of energy to heat their water, including electricity, gas, oil, and propane.
There are various water heaters available, and one can decide to go for a design that fits his or her needs. For instance, a homeowner can buy a heat pump water heater, solar water heater, heat pump water heater, tankless water heaters, and storage-tank water heater. Each type of water heater he or she buys merits a home in different exceptional ways.
Regardless of the type of water heater one installs, there are notable benefits of undertaking such an investment. For instance:
- It helps cut energy costs at home or business premises, depending on the source of energy you use.
- Water heaters are useful in difficult situations, and one can install them in different properties.
- Water heaters are easy and fast to install and start using stress-free at home.
Replacing a Water Heater- What to Know
Water heaters have many advantages and are a worthy investment thanks to their widespread use. Unfortunately, a water heating system will not last for a lifetime, and there will come a time when he or she has to replace some of its parts or the entire system. Significantly, this heating system might also get damaged or become faulty.
No one wants to use cold water when he or she has already installed a water heater. It is quite disappointing if a home heating system fails or starts experiencing some problems. This is an essential home appliance and needs urgent replacement if it is not working correctly.
Do not wait until the heater fails completely. Replace it before it stops working and end up spending a lot of money on replacement and repairs. Chantilly homeowners should not worry at all. There are Chantilly plumbers eager to lend a helping hand.
Here are the top five signs to know when to replace your water heater and keep a water heating system working adequately:
1. Water Heater is Old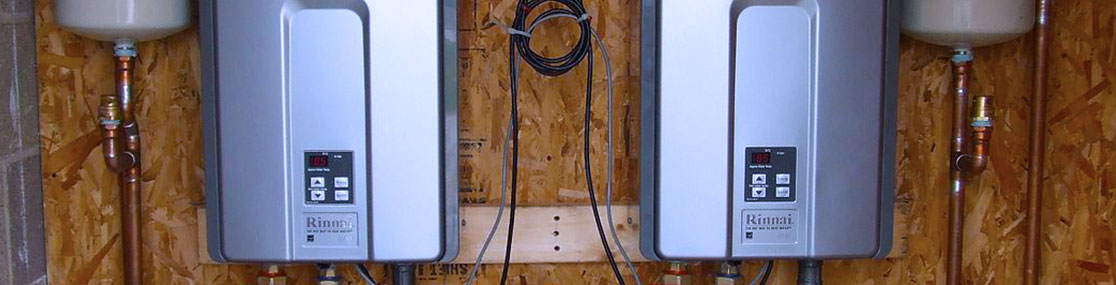
A water heating system can last from 10 to 20 years. If the water heating system one is using is older than 20 years, then it is time to think about replacing the old one with a new system. If the homeowner is not sure how old is his or her water heater, he or she can check the serial number on the producer’s sticky label.
Even if the system is working adequately, a time will come when it will fail entirely, and this is a problem one needs to avoid as early as possible. It is best for the homeowner to get ahead and replaces the entire system.
2. Strange and Disturbing Noises
Water heater noises are a telltale sign of a faulty or ailing system. As the water heating system starts aging, strange and rumbling sounds start emanating and will grow louder as days pass by without any repairs or replacement. The banging, clunking, and loud rumbling noise originating from the system can result from residue or sediment buildup.
As a homeowner keeps reheating water since the first day of installing a water heater, sediments start building up in the bottom with time. These residues harden and grow thicker on the tank floor and will wear this system down rapidly until it fails.
3. Rusty or Contaminated Water
If the water running from the heating system is rusty or contaminated, the water heater could be rusting inside or on the side. Like all metals, the metal used to build the water heater or tank can rust with time. The home will be left with rusty water that is unsafe for daily use.
A rusty valve or inlet can also lead to contaminated or rusty water. There is no perfect way to save or salvage an old water heater once there is rust. Rusty pipes can cause the water from the tank to come out rusty.
If the piping system is made up of galvanized pipes, rust could form inside as the system ages. This problem could be intense until sinks and tubs supply rusty water.
4. Water Heater Leaking
As a water heater nears its lifespan, there is a higher chance that water will start leaking on the floor and around the tank or heater. An old water heater will begin to crack, causing leaks around the water heater. The metal used in the entire system might expand when heating the system, and this will lead to cracks and unexpected leakage.
Residues at the bottom of the tank can also lead to leakage. If the water is leaking directly from the tank, it is time to replace the water heater. Remember any leakage, can cause unexpected and costly damage. These may include ruined carpeting, mold on walls and floors, and damage to personal belongings.
5. Water Heater Not Heating
The primary purpose of buying and installing a water heater is to warm water in a homestead. However, if the heater is no longer heating water, it’s time to replace it. This issue can be due to a poorly installed thermostat, broken heating element, and the tank being too small for the entire home.
Replace Your Water Heater Today
Water is an essential resource in every home, and more so if a family loves using hot water to do daily chores. However, a homeowner cannot enjoy such a source of pride if the water heater is not working adequately. The best solution is to replace an old or damaged water heater.
Worry not if looking for help replace an old and damaged water heater. Feel free to work with plumbers as they are the best in the market. These plumbers are experienced, licensed, and qualified to offer top-notch plumbing services. Available plumbing services are budget-friendly and will meet all your plumbing needs. Make a call today and get a water heater replacement and repair quote.

5 Tips On How To Prevent Basement Flooding
Having a flooded basement is stressful and messy to clean up. Depending on the size of your basement, it could take many days to clean the water. There are, however, ways to prevent floods from ever happening again.
To prevent it, you need to first read up on tips on how to prevent basement flooding. Most tips require frequent maintenance. It may seem like doing maintenance is hard but doing it will be worth it in the long run!
In this article, we will be going over five essential tips that will prevent your basement from being flooded. Towards the end of the article, we will also give you three companies that can help with any maintenance work in your basement.
Five Tips On How To Prevent Basement Flooding:
On the internet, you will find a lot of tips to prevent flooding in your basement. Here, we will narrow down these tips to five of the most important ones:
1. Taking Care Of The Sump Pump: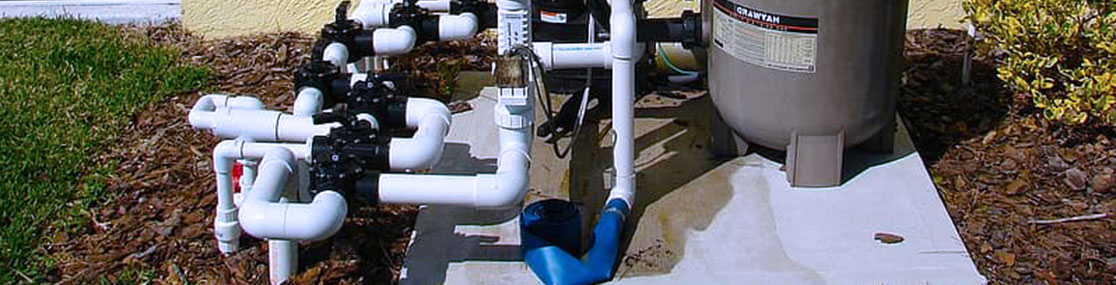
Sump pumps are a great asset to your house as they prevent mold, water damage, or flooding from entering your house. However, failure of taking care of the sump pump leads to floods. In fact, this is the number one cause of basement flooding. To prevent this from happening, doing simple maintenance of the pump is the key to prevent fewer floods. If the storm is coming your way, make sure the sump pump is working properly. Also, consider buying a generator for the pump.
2. Cleaning Gutters And Downspouts:
This is an essential tip for every home. Gutters need to be checked and cleaned for debris and downspouts need to always be positioned away from the foundation. Downspouts should be pointed away three feet from the foundation. Need something to help you? We suggest you get extensions or troughs for the downspout. Doing this simple tip will let water flow freely rather than pooling against your home.
3. Change The Landscape:
Though this might sound crazy, having an improper landscape of your house might be what is causing your basement to flood. How is this possible? Think of it this way: the slope of your yard directs the water to your house. If the slope is wonky, water will pool up around your home and therefore will find a way in. The best solution for this is to regrade your lawn or install a French drain.
3. Getting Familiar With Insurance:
Insurance is about as dominant as a tip as proper maintenance to your house is. Ask yourself these questions: do you have flood insurance? Do you have coverage for sewage backups? If your answer is no, then it is a considerable idea to get insurance. While this does not prevent basement flooding, it will prevent you from spending too much money and for you to get repairs easily.
4. Inspecting Sewer Or Septic Systems:
The last tip we will give you is checking your sewer and septic system. Failure to maintain your septic system leads to a major flood and create havoc in your house. Check all the basic parts of the septic system like the clogs.
There are tips that we have not mentioned that prevent flooding from happening like installing window well covers, inspecting and repairing foundation cracks, among other tips. These five are ones that we feel everyone should focus on when maintaining and preventing basement flooding.
Being a responsible, active owner is the key when preventing floods in your basement. Maintenance is always the number one priority when taking care of your home. Remember to always check, inspect, and clean your downspouts, sump pump, gutters, and septic system.
Checking issues like a broken pipe or water leak before a disaster happens is essential in preventing a flood down in the basement. If you need someone to do this for you, you can always contact companies like the ones above that are willing to help you.
There are tons more companies out there that are willing to give their service and save your house. Like we mentioned before, check for the authenticity of the company before hiring one to fix your house. You can do this by checking reviews from past clients. You do not want problems to be more problematic or be scammed!
Need assistance with the maintenance for your basement? The best advice we can give you if you need help with maintenance is to hire a company. When hiring one, make sure to check for the authenticity of the company (experience, reviews, awards, etc.)
Doherty Plumbing offers top Arlington plumbing services. The services they provide include drain cleaning, faucet and sink installation or repair, garbage repair or installation, gas services, sump pump repair installation or repair, and more. Contact us today to know more information.
Preparing Your Sump Pump for the Summer Storms
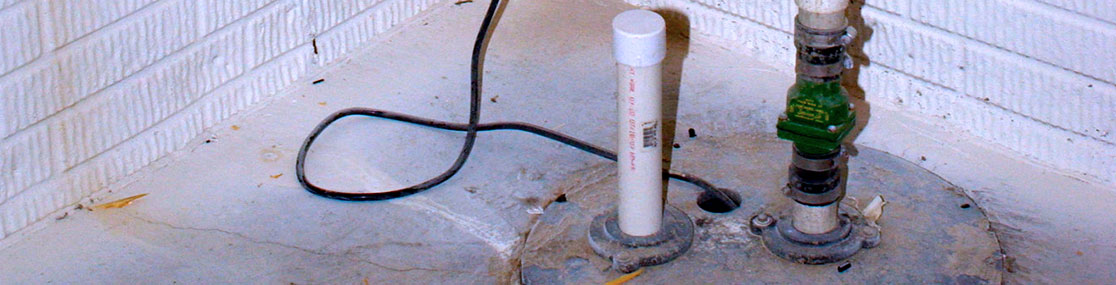
A sump pump is one of the incredible systems to invest in your home. This is a pump widely used to remove water that has accumulated in the sump basin. It is commonly found in the basements of most homes in the United States.
A sump pump aids redirect any floodwater that seeps into a home, making sure that nothing damages the basement or any belongings inside it. This system’s primary purpose is to prevent any flooding in a home and keep a home dry. This system will redirect any excess water in the house and more so in the event of a storm.
Homeowners should not have any reservations investing in a sump pump. It’s a worthwhile investment, and here are other incredible ways that the system can impact a home. Have a look:
- Prevent sewerage blockage and related problems
- Reduces the effects of mildew and mold growth
- Reduces the dangers of unexpected electrical fires
- Enhances the indoor air quality inside a house
With the many benefits of a sump pump, homeowners should make sure this system is correctly working all year long. Unfortunately, this system will not last forever and will come a time to replace it or repair it frequently. With summer storms approaching, don’t just sit there.
Start preparing a sump pump and keep a home humidity free. If stuck, opt for Fairfax plumbing service and overcome the many problems associated with a faulty sump pump.
Preparing A Sump Pump- Everything You Need to Know
It is essential to keep the sump pump working correctly to avoid unnecessary woes at home. Regular inspection, repair, and maintenance will help solve any unforeseen problems with the system. A homeowner who has just invested in a sump pump for the first time may not know how to prepare the system for summer storms.
Fret not. It’s high time to prepare a sump pump for summer storms, and here is how to go about it. Have a look:
1. Ensure the System is Connected to a Working Outlet
A properly working sump pump should efficiently keep water running into a home as it is also kept running by electricity. Therefore, a homeowner must make sure that every part of the whole system is working appropriately. Some people just assume their system is connected correctly, but it is always not the case.
Many will keep saying their system is not working, but they have not even checked whether the sump pump is plugged to the right outlet. Significantly, the system may also not be getting enough power to keep the system running. Any problem with the outlet should be left to a professional. Call a nearby technician if experiencing such an issue with the sump pump.
2. Ensure the Sump Pump is Working Properly
When the storms occur, the sump pump should successfully remove the excess water from the basement and keep the property safe. Homeowners have to make sure their sump pump performs its role when filled.
It’s easy to examine this system and make sure the system is working appropriately. This is a DIY any homeowner can undertake. To get started, open the lid of the sump pump, and fill the system with water and make the float move upward.
A working pump will kick in right away and start removing the flooded water outside the home. If one is not getting any response, go on and unplug the entire system and then plug it back in and rest it. Sometimes, he or she needs to rest the whole system and have it working once more.
3. Inspect the Sump Pump and Clean It
It should not be daunting to inspect the sump pump and clean it, and this is a procedure one can DIY and keep his or her system working again efficiently. Start by turning off the electricity if the system is still plugged into an outlet.
Go on and inspect the system and clean it and ensure it is running correctly. If one cannot do-it-yourself, feel free to call a plumber who will perform top-notch sump pump maintenance.
4. Pay Attention to Symptoms of Corrosion or Strange Sounds
One vital sign that a sump pump needs proper preparation before the summer storms begin is flooding the basement. Strange noises are another common symptom to focus on and prepare the system for hard times to come.
Don’t just focus on these few symptoms of a poorly working sump pump. There is a lot to do and be prepared for the harsh climatic conditions that might affect the system’s performance. Other signs to pay attention to include:
- Whether the sump pump is out of date or already aging.
- It’s rusty, and the debris keeps clogging the entire system.
- Keeps vibrating excessively when running.
- Keeps running all the time and for long, especially if the switch is the problem.
- The motor gets stuck and keeps failing due to an internal wiring problem.
Once one notices these problems, it’s high time to take immediate action and have the entire system inspect by a professional and do the necessary repairs. Don’t get red-handed by summer storms when your pump is faulty.
5. Check the Sump Pump Frequently
Homeowners should not only inspect the sump pump because they have noticed a few symptoms but also even during summer storms. Keep examining the system even during the storms and check whether it is discharging water as projected. This is a great way to ward off surprises like waking up to a flooded basement or home.
Get Help Prepare Your Sump Pump For Harsh Climatic Conditions
Installing a sump pump is a rewarding and guaranteed investment to make as a homeowner. However, keeping this system in the best condition and working properly is not easy. Frequent maintenance is crucial to keep the system working correctly during summer storms or harsh climatic conditions.
Don’t just sit there and assume this is a minor problem with your system. Feel free to seek help from a plumbing company and have an expert inspect or repair the sump pump. Go for a service provider who offers top-notch services that are also budget-friendly.
Work with a plumber who is qualified, experienced, and competent enough to provide quality services.

Handy Plumbing Tools to Keep Around the House
There is a lot that a homeowner has to do to keep his or her home in the best condition all year long. With myriads of home improvement projects to think of, one has to go for a project he or she can undertake stress-free. The home remodeling project a homeowner thinks of should be rewarding, budget-friendly, and an endeavor he or she can DIY.
Many people just leave most the home improvement projects in the hands of professionals. It’s a wise decision depending on what improvements one plans to undertake. Plumbing is one of the common projects that many people frequently undertake in their homes.
Plumbing problems are quite common and it’s wise to have some skillsets and experience to handle some simple do-it-yourself projects. On the other hand, there are handy plumbing tools one should own and be able to effectively solve simple plumbing problems. The good news? As a resident of Fairfax, VA and surrounding areas, don’t have any worries if don’t know how to go about solving plumbing issues.
Make Plumbing Projects Easy and Efficient
Plumbing Fairfax VA is easy and pretty straightforward with the right tools and guidance from experienced plumbers in the region. There are many plumbing experts who are eager and happy to help their clients undertake plumbing projects on their own. With the right skillsets, willpower, and right DIY plumbing approach and tools, it’s not that daunting to solve some of the common plumbing problems.
In this light, here are the best plumbing tools to keep around the house. Have a look:
Plunger
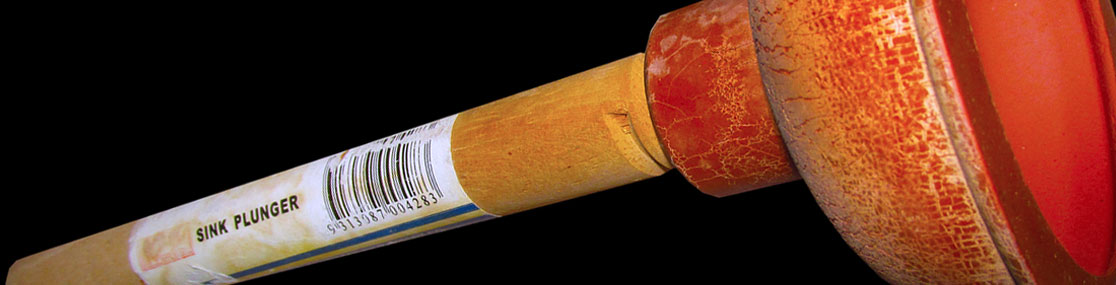
Even if a homeowner prefers hiring the services of a professional plumber in Fairfax, VA, it’s wise to own a plunger. This is one of the amazing plumbing tools that should not miss in the garage and toolbox. A plunger helps clear blockages in drains and pipes.
A common plunger will come with a cup that is pushed down the drain opening to force air in. a homeowner has to push it gently until the rubber cup is flatted and then pull it out. A plunger will loosen or break up a clogged drain.
The common types of plungers to keep around the house include:
- Cup plunger in your sink drains, bathtub drains and shower.
- Flange plunger comes with an extension that you can fit into the toilet drain and unclog the blockage.
- Accordion plunger aids unclog toilets but you must fully submerge it into water.
Tongue and Groove Pliers
Tongue-and-groove pliers are amazing slip-joint pliers also known as adjustable pliers, water pump pliers, or multi-grips. Use the tongue-and-groove pliers to turn and hold nuts and bolts. It’s a great tool for holding objects that are irregular as well as clamping materials. One can also use these pliers to rotate objects while maintaining their position.
Wrenches
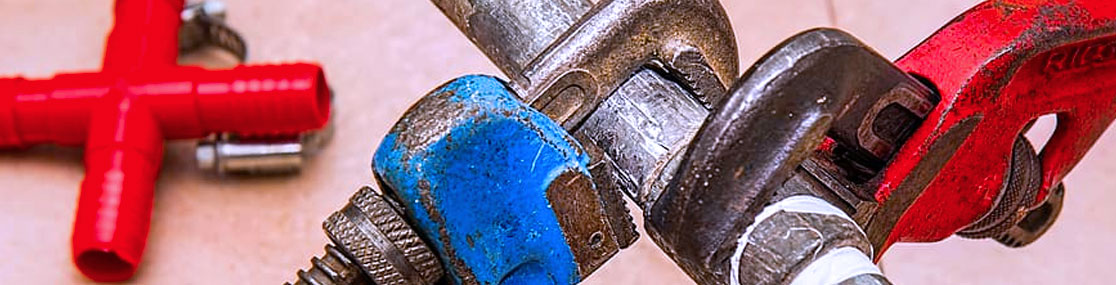
There are varied types of wrenches a homeowner should own and cater to all plumbing problems. There are incredible types of wrenches to own and ideal for plumbing projects. They include:
- Basin Wrench – Also known as sink wrench can be a handy tool to use to change and tighten an old faucet in the kitchen, laundry sink, or bathroom.
- Adjustable Wrench – This is a great tool to use and remove fixture shutoff valves, nuts and tubes on faucets.
- Basin Wrench – This is a type of wrench great to work on different and hard-to-reach areas under a sink. And if a homeowner is replacing a sink or doing some repairs, a basin wrench is ideal tool to own.
Plumber’s Tape
A plumber’s tape is an important material to own and ideal for preventing leaks around threaded connections in a plumbing system. Also known as Teflon tape, this tape is easy to use and wrap around threads on pipes.
Tubing Cutter
A tubing cutter is an ideal plumbing tool to use when working on copper pipes. It helps cut the metal when undertaking a plumbing job and using copper.
Plumbing Snake
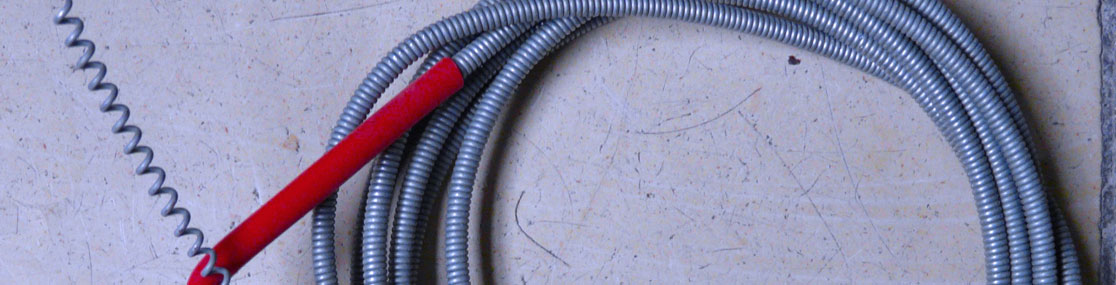
Also widely known as an auger, a plumbing snake is a great tool for clearing blocked drains when any type of plunger cannot do the job perfectly. It features an incredible metal coil on one of its end which a plumber has to insert into a drain and unclog it.
Hacksaw
A homeowner will need a hacksaw to cut through plastic pipes and metals. It’s a great tool to use and cut stubborn bolts or nuts during a plumbing exercise.
Other Handy Plumbing Tools
Other handy tools great for plumbing include; screwdrivers, caulk gun, propane torch, locking pliers, and a metal file to name but a few. Even with these tools in place, some plumbing projects can be challenging. It’s a wise decision to hire the services of experienced, skilled, licensed, and well-trained plumbers when the need arises.
5 Tips On Water Conservation
Water is an important element for any house. We use water every day for drinking and cleaning. That is why a lot of individuals are conserving water. Why conserve water? Conserving water helps you in three ways which include:
- Having a lower utility bill
- Contributing to the environment by saving water
- Making water more drinkable and affordable for both humans and animals
With that being said, conserving water is key for protecting the Earth but also for you to save money. Want to know how to save on water? We will go over five tips on how to conserve water.
5 Tips On Conserving Water At Home:
For each tip, we will give you one tip for each appliance that uses water and how to conserve it:
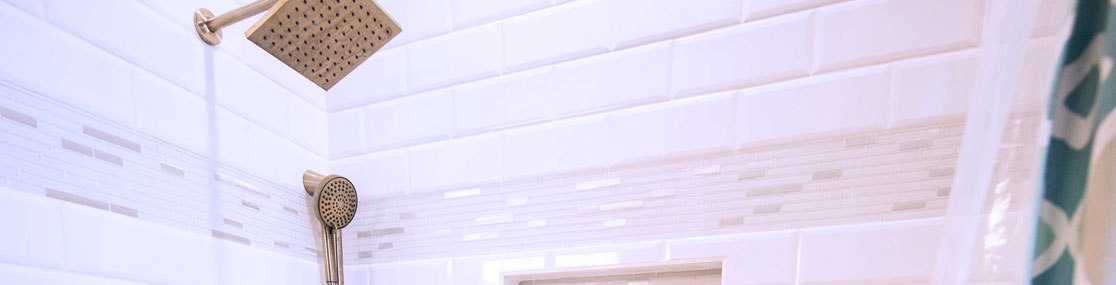
- Take Shorter Showers and Showerhead: On average, an 8-minute shower takes about 12-64 gallons of water, though this depends on the type of showerhead you have. For showerheads, go with a low-flow showerhead. Low-flows lets you use less water (about 15 gallons!). For taking shorter showers, turn off the water when you are soaping up and then turning it back on when you are rinsing.

- Turning Off The Faucet When Washing Hands or Brushing Teeth: If you turn on the water before lathering up your hands with soap, you waste about 7.7 gallons of water. Simply lather your hands first before turning the water on to rinse. The same goes for brushing your teeth: running water before applying toothpaste waste 2.2 gallons of water. Make sure to apply toothpaste and then turn on the water.
- Upgrade Your Dishwasher and Washing Machines: Buying a dishwasher and a washing machine that conserve water is a great addition to your house. These types of machines are a little expensive, but it is good if you want to lessen up your utility bill.
- Installing A Water-Efficient Toilet: Like the dishwasher and washer machine, installing a high-efficiency toilet will save water. Flushing the toilet 5 times a day uses about 25 gallons of water.
- Water Your Plants Early In The Morning: By doing this, the water has less chance of evaporating because it is cooler in the morning.

If you follow these five tips, you will be able to save water and money at the same time. Other than these tips, it is also a good opportunity to talk to plumbing companies and how they can assist you in conserving water.
A Company That Will Help You Conserve Water:
Besides the five tips that we mentioned above, it is also important to spot leaks and to fix them. If you don’t catch these problems immediately, you will lose more water than save! This is where a plumbing company comes in. They can help you by:
- Acknowledging the problem and coming up with a solution
- Fixing the leak before it gets worse
With all of these tips, it is best to start Conserving water at your house today!
Doherty Plumbing “Quality Arlington Plumbing Inspection And Repairs For Residential and Commercial Facilities in Virginia”: One of the best companies in Virginia, Doherty Plumbing offers their services in Northern Virginia, Chantilly, Herndon, and Centreville. They do repairs for your sink, toilets, or garbage disposal.

How Plumbers Respond To The COVID-19 Pandemic
Due to the COVID-19 pandemic, you might think it is impossible to contact a contractor who is willing to fix your plumbing. Fortunately, however, there is a way to contact these professionals even with the outbreak happening. Want to know how to get into contact with a contractor? In this article, we will be discussing what these professionals do as pre-cautions during COVID-19 and how to find a reliable plumber.
How To Contact A Plumber And How They React During COVID-19?
Believe it or not, you can still contact plumbers in Fairfax VA even during the current outbreak. However, before hiring a plumber, make sure you find a good plumber and make them answer these questions before getting a plumber to your house. These questions will keep you and the plumber safe from getting COVID:
- Finding a Plumbing Company: An important step in finding a plumber is getting an adequate plumbing company. Companies that are residential or commercial are a reliable option for finding a plumber.
- Make Sure You Hire a Professional Plumber: Having an experienced plumber is another important step before hiring one. If you get a plumber who is not licensed, they will make mistakes that will make your situation more costly and damaging.
- Check Reviews Of The Plumber: Don’t take the word of the plumber as they could lie to you. You want to make sure they are great at their jobs and are professionals. You can do this by looking for reviews of previous customers. The customer reviews will give you an insight if the plumber is good at their job or not.
- Ask The Plumber The Pre-cautions They Are Taking: Questions that you should ask the plumber are these to make sure they are keeping themselves and you safe: 1) Which sanitation procedures are they taking regarding their supplies or equipment 2) Does the plumber have gloves, sanitizing wipes, masks, and eye protection 3) When the plumber arrives at your house, what should you expect with hand-washing and 4) Can you pay the plumber over the phone rather by hand?
Once you find the right plumbing company or plumber to get the job done, here is what to expect when the plumber arrives at your house:
- Before the plumber arrives, it is advisable to wipe down the area that the plumber will be working at before he/she arrives.
- The plumber should be equipped with goggles, masks, protective wear, gloves, and booties already on. Along with the equipment, they will have disinfectant spray. This spray is to spray everything down before they begin doing the work and after when they finish the job.
- When you are with the plumber, make sure you keep your distance (about 6 feet) and it is preferred for you to wear a mask.
- Once the job is done, the plumber will spray the area down with disinfectant. For you to pay the plumber, you can simply do it over the phone rather than doing it by hand.
These precautions and regulations will benefit you as this will prevent you or the plumber from getting COVID-19 while also making sure the job gets done right.
Now that we told you what to do and expect when a plumber arrives, Doherty Plumbing offers plumbing services like installing or fixing faucets, toilets, drains, or the garbage disposal. We serve Chantilly, Herndon, Centreville, and Northern Virginia. Call us today for to get a quick quote!

Why You Need to Get a High-Efficiency Electric Water Heater
Not too long ago, even the idea of having a high-efficiency electric water heater installed by a plumber would have been an oxymoron.
The cost of using this kind of water heater have been high for a long time, and as a result they’ve mostly been found in areas where gas lines couldn’t be run to a home.
Fortunately, that’s changing quickly. The technology and efficiency of electric water heaters has been making great strides recently, and better products are coming on the market as well. The tradeoffs are changing, so it’s important to be aware of the latest info to get the best possible high-efficiency electric water heater.
Know Your EF
Start with the efficiency rating. When it comes to water heaters, this is expressed as the Energy Factor (EF), and the way the number works is relatively simple.
- The higher the EF, the more efficient the electric water heater
- Most standard electric heaters have an EF of .75
- The new generation of high-efficiency electric water heaters is boosting that number to 0.9
If the electric water heater has a storage tank, that efficiency number can go up as high as .95. In that scenario, though, some heat is lost as the water moves from the storage tank through the heater and then up through the pipes into the house.
Tankless Electric Water Heaters
Another technology that has had an impact on the efficiency of electric water heaters is the move toward tankless. These heaters use electric coils to instantly heat a flow of water, after which it is used immediately. As a result, no tank is required to store hot water, so the efficiency is increased because no heat is lost due to cooling in the tank.
There is a catch, however. Water must be heated as fast as it can be used, and this is measured through a spec called temp rise, which is the amount of heat in degrees the heater can generate at a given number of gallons per hour flow rate.
A quick example: If water enters the heater at 50 degrees Fahrenheit and the desired temperature is 120 F, the heater must generate 70 degree rise at a flow rate that’s high enough to meet household demands.
Hybrid Hot Water Heaters
Another technology that must be included in the conversation is hybrid hot water heaters. These types of heaters use a heat pump along with electrical resistance to add heat.
To do this, the heat pump extracts latent heat from surrounding air, then transfers it to the water in the tank by using a head exchange device. It also incorporates resistance coils inside the tank to provide necessary heat to raise the water temperature to approximately 120 F.
Hybrids come with specific strengths and weaknesses, however. They typically use 60 percent less electricity than their strictly-electric counterparts, which means the EF rating can rise above 2.0.
The downside is that hybrid heaters tend to be taller than standard ones, and as a result they may not fit into existing water heater closets. Also, the heat pump releases a large amount of cold air through its exhaust, and that air must be vented away from the house.
All of this makes the buying decision somewhat more complex, with several factors that have to be evaluated. Let’s start with capacity.
Know Your Capacity
When considering a high-efficiency electric water heater, it’s important to match capacity with demand.
If the unit has a tank, a measurement called the First Hour rating is especially critical. This number specifies how many gallons of hot water the heater can produce in one hour at peak demand to meet a specific thermostat setting.
Knowing this number simplifies things enormously. Simply put, the FH must be above peak household demand to make sure everyone gets a hot shower.
Summary
The typical cost range for a high-efficiency electric water heater is from $1000-3000. Performance-wise, these units are usually anywhere from 100-300 percent more efficient than standard water heaters. With a conventional gas-fired hot water heater with a storage tank typically has an Energy Star EF between 0.67 and 0.70, so there’s plenty of room for improvement in that regard.
A new standard electrical hot water heater typically uses ten times more electricity than the average new refrigerator, so it’s more than worthwhile to consider the extra efficiency that’s coming on the market with electric water heaters.
To get the best possible product installed by an Arlington plumber, call Doherty plumbing and let us do the job right for you!
5 DIY Plumbing Mistakes And How To Avoid Them
DIY projects, in general, are easier alternatives than hiring someone to get the job done. If you are planning to do a plumbing project or to fix your bathroom, however, you want to be sure you don’t make any mistakes while doing the job. There are common mistakes that DIYers make when doing a plumbing job. Here we will talk about the 5 plumbing mistakes and how you can avoid doing the same mistakes.
Many mistakes happen when it comes to DIY plumbing. Here are five common mistakes of DIY plumbing:
- Forgetting How Things Go Together: One of the biggest common mistakes is forgetting how to put things back together. Dismantling is easy, but putting it back together is tough. If you put it back together incorrectly, it will lead to more repairs. You can avoid this mistake by taking a picture of every step of your process.
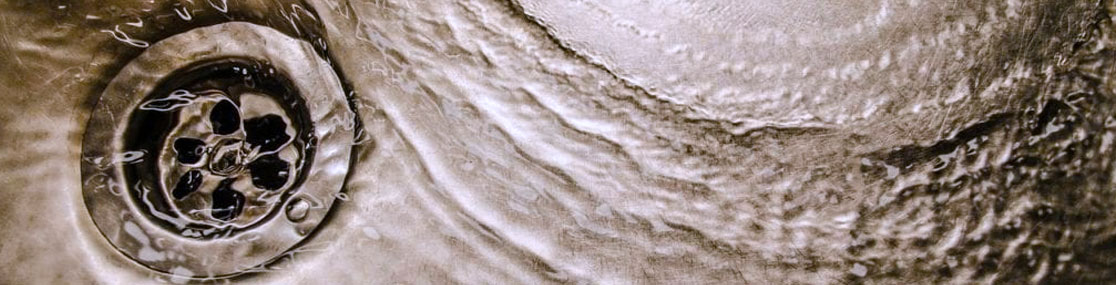
- Cleaning Drains Improperly: Using the wrong chemicals to clean drains can lead to damage in the pipes. Not only that, but it can also cause severe damage to a person, animals, or the environment as most chemicals are not safe. To avoid this risk, you should be aware that plungers are designed not just for toilets, but also for sinks and tubs. You can also use augers or snakes.
- DIYing A Plumbing Project With Little Experience: Before starting any DIY project, especially one that requires fixing an appliance, you need to know how to do the project. Little experience or little knowledge can cause more damage and money. Ask an Arlington plumbers VA questions on how to do a certain project before you begin.
- Forgetting Turning Off The Water: Projects that require working with water have this common mistake where people will forget to turn off the water. If you don’t turn off the water before doing your project, this can lead to gushing pipes or a flood. To avoid getting water all over your house, know the plumbing of your house and turn off the water at the shutoff valve or the water main.
- Pipes That Are Inconsistent: As you know, some pipes are made with different materials. These materials include galvanized steel, copper, brass, plastic, and other materials. Some of these pipes can join together, however, it is not an ideal choice to do so as this can lead to leaks. The best option is to get new pipes to replace the old ones so you can avoid leaks.
Doherty Plumbing ‘Doherty Plumbing Has Worked On Hundreds Of Commercial Projects Since 1994.’: Doherty Plumbing is a good choice for plumbing projects. They not only serve Arlington, but they also serve other places in Virginia like Fairfax, Reston, Springfield, among other areas.