
5 Reasons Why Your Toilet Won’t Flush
The bathroom is one of the most used areas in a home, thus it is not uncommon for a toilet to become clogged with use over time. This can be caused by several things, all of which are easily controlled if addressed immediately. If a problem arises that cannot be handled without professional assistance, the best Arlington plumbing company has a reliable, affordable team readily available to fix whatever problem a homeowner faces. Here are some of the most common reasons as to why your toilet won’t flush, and what can be done about it.
- Something is blocking the pipe
This can be a number of things, as families with younger children may have to deal with toys being flushed, or could be other objects that may have accidentally fallen into the toilet bowl, such as cell phones, watches, etc. This is common but can lead to blockage and clogging that will backup the normal flow of water. Oftentimes, a traditional, high quality plunger can dislodge the flushed object through the use of suction, or at least will lower the water level enough so that one can attempt to reach the object by hand. Another option is to use a toilet auger which clears the pipe through, but if the object remains lodged, then calling a plumber is the next step.
- The lift chain is damaged and/or disconnected entirely
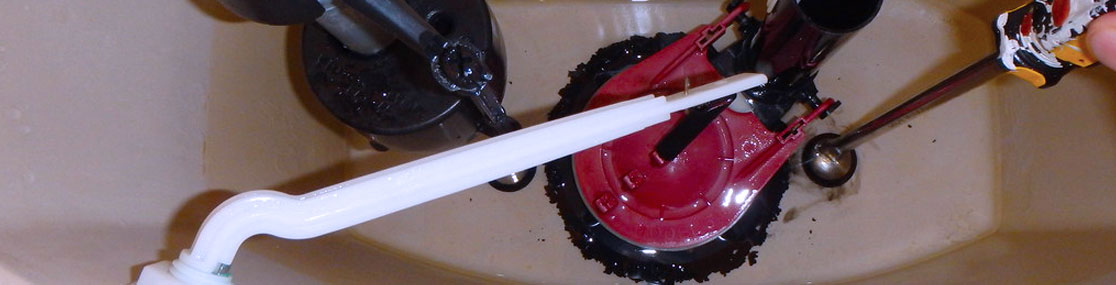 Another common issue is dealing with a damaged or disconnected lift chain, which opens and closes the toilet’s flapper when it is flushed. Adjusting the length of the chain, or how much slack it has, can be done easily by an individual without the use of plumbing services, as it is a common problem that occurs with use over time. Repairing of the chain may be needed, if the chain is at all damaged, and this can be done individually or with professional assistance from a qualified plumbing technician.
- The toilet has a damaged flapper
This, again, often comes as a result of use over a period of time and affects the flowing of water into the toilet bowl when flushing occurs. The flapper can become warped, bent, or undergo further damage and will cause the water to not refill following flushing. Replacing it is easy to do and not costly, and if someone is uncomfortable replacing it on their own, professional help is recommended but not necessary.
- The water is not being refilled properly
 If the water level in the tank is too low, the toilet will not flush properly, and this can come as a result of a turned off valve or another issue. Ensure that the tank is filled to one inch below the overflow tube, turning the valve on and watching as this is done.
- Damaged Overflow tube
A damaged or cracked overflow tube will cause the water to not refill the tank following flushing, and instead flow into the overflow tube. Check to ensure the tube is performing properly and is not damaged. If it is, replacing is a simple task and is inexpensive.
All of these are common issues that every homeowner faces at some point, all of which can be fixed at home or with the help from Doherty Plumbing can help you with any plumbing problem that is too difficult to deal with alone .

How to Save on Water Bills
There are times when you will observe your water bill is higher than what it used to be. That is something you cannot afford since it used to be the cheapest house bill. Good thing, there are a few things you can do to save on your next water bills. These strategies are important since you have a lot of other bills to pay. When one increases, you would need to adjust. Here are a few things you would need to do to save your future water bills:
Replace Old Water-Using Appliances
When water-using appliances get old, they consume a lot of water. Thus, it would be time to buy a new one. You may be investing in a new appliance, but you no longer have to settle for an old one. You can enjoy new features and the fact that you are going to save on your water bills for the foreseeable future.
Use Washing Machine for Full Loads Only
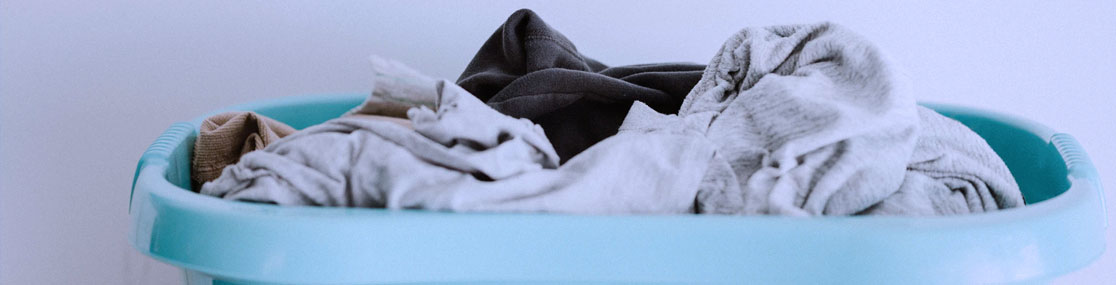
When you have a lot of clothes and blankets to wash, that is the only time when you should use the washing machine. Yes, you must not use it when the capacity is not full yet. You must make sure the number of clothes you must wash is enough.
Recycle Water
Believe it or not, there are a lot of ways to recycle water. For example, you can collect rainfall and use that water to wash the dishes. Another good example would be using the water left in your drinking glasses to either water the plants or flush the toilet. Besides, it is alright to use recycled water for those purposes instead of used ones.
Turn Off Water When Not in Use

When you take a shower, better turn off the water when it is not in use. It may be only a few seconds but imagine the amount of water you will save when you always do it. Another instance would be turning it off while applying soap on your hands during times that you are washing it.
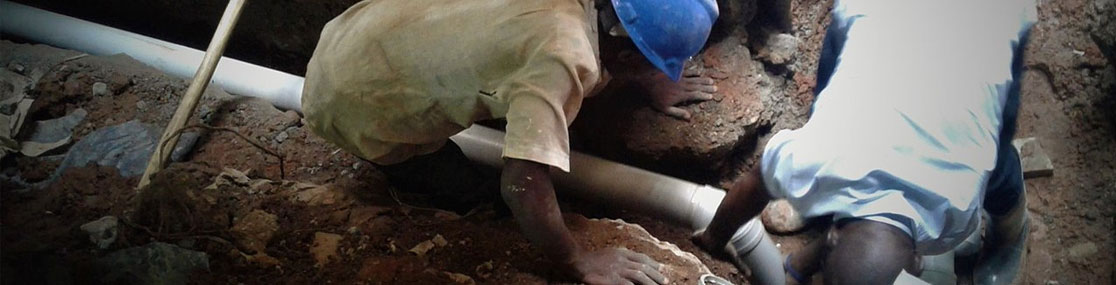
Call a Professional Plumber
It would be wise to call a professional plumber so this person can inspect your water system. The person may find some leaks and fix it. You are going to notice how the water will run smoothly after the plumber gets done with it. After all, he did not become a plumber if he did not know how to fix those types of stuff. He went through a lot of tests before becoming licensed.
If you need plumbers in Arlington VA, the best company for the job is Doherty Plumbing. We have been in the industry for a long time, so we have encountered all types of plumbing problems. The next thing to do would be to contact us through email, call, or even send us a message through our contact form, we will get back to you as soon as possible. Besides, we would not want to keep you waiting. In fact, we guarantee to give you ultimate customer satisfaction.

Guidelines on How To Look For Your Star Plumbers to Work With Your Plumbing Needs
When it’s time to choose a plumber for your plumbing needs, it can be difficult to find one that does not cost an arm and a leg yet who does work that you can trust. Plumbing projects can range from a clogged drain to a complete bathroom remodeling job. Finding good plumbers services in VA can be time-consuming and challenging. However, this article from Star Plumbers will help you by breaking each step down and providing helpful tips along the way.
The Plumber Classification System
Did you know that there are four different types of plumbers for hire? Each one has specific levels of experience and will charge their rates accordingly.
The Apprentice
An apprentice plumber is working with either a union or a nonunion contractor organization. Training for an apprentice will include classwork and paid hands-on training under the supervision of either a journeyman or a master plumber. In order for an apprentice plumber to land a job with a more experienced one, he will need to be good at math and logical thinking, have the ability to move around on the ground quickly and easily, able to solve problems and be mechanically savvy.
An apprentice plumber will also need to be able to relate to others as the plumbing trade requires interaction with clients, salespersons, other tradesmen, and suppliers. Most apprenticeships take between four and five years to complete and require a certain level of maturity and dedication.
Those who are interested in becoming apprentices should focus on math and science in middle school and high school. A future plumber does not need to be a genius at math, but he does need to at least have a solid foundation of numbers and how they work.
Courses to consider strongly include algebra 1 and 2, geometry and physics. The apprentice should also consider courses in drafting and computer science. A high school diploma is a requirement fo obtaining an apprenticeship. If you did not graduate, the next option would be to take and pass a General Education Development test (GED).
A trade school or vocational college is a great option for improving the odds of getting an apprenticeship with a more experienced plumber. Such coursework is not necessary, but it can give the prospective candidate a leg up over the other applicants. All apprenticeships require a certain amount of coursework, so having a background going into the field will give the applicant a head start.
Upon completion of the apprenticeship, many schools and colleges will help you get into a plumbing company, labor union or with a master plumber. The school should be accredited and offer courses in drafting, math, accounting, computer software, plumbing codes, domestic piping, commercial piping, cost estimating and construction materials. Upon completion of the course, the apprentice will receive a certificate or a degree.
After completing the coursework, the prospective plumber will need to prepare for the aptitude test. Not all plumbing apprentice programs require this test, but those who do are often more selective in who they choose as a candidate for their programs. A practice test or a study guide is strongly required before actually taking the test itself.
Application for a plumber’s union apprenticeship is generally the easiest way to land a job. A union will provide all the necessary coursework for their applicants and will help them get paired up with a licensed journeyman or a master plumber to launch their career. This will save the apprentice the step of having to locate a licensed tradesman on his own. Additionally, unions offer benefits to their members such as sick leave, medical insurance, and disability insurance.
If the apprentice-hopeful doesn’t want to be part of a union, he can locate a private plumbing company willing to hire an apprentice. This option will require sending applications to many small companies before finding a match. Going directly to a private plumbing company immediately after leaving trade school does not allow the freedom to learn as much as would be possible with the union route. In addition, the apprenticeships found in the private sector tend to be less structured, feature low pay and are not as adept in teaching or training new plumbers.
The Journeyman
A journeyman has completed the four- to five-year coursework required to be able to work alone. Journeymen are also known as journey workers and journeyman plumbers. The journeyman is able to work with water and drainage systems in residential and commercial applications alike. Jobs can include installation of new plumbing fixtures, unclogging drains, maintaining sewage and gas lines and troubleshooting.
While a degree is not required to become a journeyman, it is necessary to obtain postsecondary training through either an apprenticeship or a trade school. Apprenticeships are the best way to go, as they offer on-the-job training in real-world situations. In most cases, the journeyman plumber designation is reserved for individuals to have successfully completed an apprenticeship program.
The journeyman will also have demonstrated experience and expertise with plumbing equipment, stamina and physical strength, an understanding of accounting and an ability to work with CAD software and word processors. The United Association of Journeymen presents a five-year apprenticeship program for persons interested in becoming journeymen plumbers. The program includes a minimum of 246 hours in the classroom and between 1700 and 2000 paid training hours on the job.
Upon completion of general classwork including welding and pipefitting, the apprentice can choose a specific plumbing career path. At this point, the apprentice will be able to take the journeyman licensing test and will be able to work independently. Requirements to become licensed will vary from state to state. In general, a journeyman must have two to five years of experience in plumbing and be able to pass a test evaluating their knowledge of plumbing.
In order to maintain a valid license, journeymen must complete continuing education on a regular basis. In some states, the renewal of a journeyman license is required every 12 months. Others only require renewal after three years. The required number of hours and courses needed to obtain a renewal also vary by state. In the state of Virginia, a journeyman license will require the following standards be met:
- Two years of hands-on plumbing experience and a degree or certification showing the completion of a two-year trade school, technical school or community college program OR
- Four years of hands-on plumbing experience and 240 hours of formal vocational training OR
- Five years of hands-on plumbing experience and 160 hours of formal vocational training OR
- Six years of hands-on plumbing experience and 80 hours of formal vocational training OR
- A bachelor’s degree in an engineering curriculum related to plumbing and one year of hands-on plumbing experience OR
- 10 years of hands-on plumbing experience that is verifiable by an affidavit who observed the applicant’s work over the course of this period of time.
The Master Plumber
The final step in the career of a plumber is to earn the master plumber certification. This will allow the journeyman to take on more advanced roles such as supervisor of other plumbers/apprentices and planning, design and execution of both residential and commercial plumbing systems.
The master plumber will have a greater level of experience with both the hands-on and business sides of their profession. This will include the skills and knowledge needed to maintain both indoor and outdoor plumbing configurations and extensive knowledge of plumbing codes and regulations at both the state and federal levels. A master plumber is more likely to be specialized in a specific area of his plumbing career path. These can include pipefitter, steamfitter, pipelayer, gas service, project manager and business owner.
In general, the master plumber designation requires two years of experience as a journeyman plumber and successfully passing specific examinations. These tests will evaluate the candidate’s knowledge of specific topics including building code, plumbing techniques, and business management. Other questions can include topics such as business law, contract composition and execution and how to work with clients. These questions ensure that only the appropriate persons receive the master plumber designation.
After passing the exam, the master plumber will be issued a license number. In order to maintain his license, he will need to complete the required level of continuing education. In the state of Virginia, the requirement is a three-hour course every two years. Some contractors choose to join an organization to keep up with the newest developments in the plumbing industry. As a homeowner, you have the right to request information about the plumber’s license number, his level of experience and the amount of training he has.
Tips on How to Land a Good Plumber for Your Home or Business
Ask Around: Working Your Network
Anyone in the world can say that they do a good job for their customers, but unless you have a way to view their track record, there is no way to really know. Try to work with friends and family members in getting the service that you need, as a friend/family member will be much more likely to give you an honest review. They will also give you tips on who they did not like and why they recommend the plumber they do.
Another source for recommendations is remodeling contractors and real estate agents. Because a home with plumbing problems is bound to have difficulty selling, realtor often has a list of reliable plumbers that they will call in the event of a plumbing problem.
You can also ask the plumber himself for references of people who are satisfied with his work. Be aware, however, that this process might take some time. The plumber will need to ensure that his former clients are okay with him sharing their contact information with a stranger.
Don’t Believe Everything You Read Online: How to Find Real Reviews
Obviously, if you are having a crisis, you might not have the time to do a thorough amount of research for the best plumber. In times like this, you might just have to take your chances and hire the one who can be there the fastest. At other times, however, you would benefit from taking the time to locate a plumber who has proven himself over time. Online directories are great places to locate pre-screened contractors you can work with. Look for reviews that are not paid or sponsored. The Better Business Bureau is a reliable source of real data. You can verify any reviews you find by using “fake review detector” websites such as Fakespot and ReviewMeta.
Finding Quality Contractors: Online Referral Services
In recent years, online referral services have really taken off. Places such as Home Advisor, Angie’s List, Networx, Yelp, Houzz and Handy are all great places to start where real customers post their experiences working with a particular contractor or private plumber. Using either crowd-sourced reviews or in-house vetting, these referral services are easy to use.
Print Ads: The Paper is Not Necessarily Proof

Printed ads found in the yellow pages or in your newspaper are not necessarily a guarantee of a good plumber. Companies who have a lot of money invested in their advertising campaigns will often have higher bid prices than those who done. Also, the best tradesmen will not need to advertise. Word-of-mouth will be sufficient to keep them in business. This is the best way to find a plumber and should be used at every opportunity.
Licenses, Insurance and Warranties: Why They Matter
Plumbers, electricians, locksmiths and HVAC technicians are all required to have licensing to work in their respective states. You as the client have the right to request proof of licensure before allowing a plumbing contractor to work on your home or business. The license should be up-to-date. You can further verify a plumber’s credentials by looking at the license up at the Department of Professional and Occupational Regulation.
Although you might have homeowner’s insurance, the plumber you select should have workman’s compensation along with at least $500,000 of liability insurance to cover any injuries that might occur during the course of the project. This coverage will also extend to any additional personnel that is working with the plumbing contractor. The best plumbers will guarantee parts and labor for at least one year after the service. Any plumber who does not offer a warranty with the job should be questioned at the least.
Are You Bonded? (This Has Nothing to Do with Jail)
Bonding is perhaps one of the least understood aspects of contract work. When a company or individual is bonded, you as the consumer are protected in the event that the contractor fails to meet any financial obligations such as paying for supplies or completing a job. A bonded contractor will pay a premium to a surety company in the event that something goes awry with the job. To ensure that the plumber you are working with is bonded, you can ask for a bond number and certification.
Bonded employees, on the other hand, have had a background check and is done when the employee will be responsible for handling highly valuable materials. In the event that the employee breaks trust, the bonding company will compensate for your loss.
Independent Plumbers vs. Large Companies

Large plumbing companies will have a pool of workers that they will pull from to send to your home. In most cases, you will receive the plumber who is available at the time of the call. In cases such as these, you might do well to work with a company that provides background checks on all their employees. Because the plumber you speak with might not be the one sent out to your home, ask about experience and credentials before setting up an appointment.
Private contractors hold the certification for their jobs and are more likely to have the experience and quality of work you want. Private contractors are often in high demand and may be hard to book if you need a job done immediately.
Professional Appearance: How They Look, Dress and Behave
When the plumber comes to give you an estimate for the job, observe how he dresses and carries himself. A quality plumber will wear a uniform if he is associated with a large company. If he is a one-man shop, he may or may not wear logoed clothing. However, he should still be dressed appropriately and be well-groomed.
The “vibes” you get from the plumber should also play a part in making your selection. If someone makes you feel uncomfortable in any way, do not hire him to work on your home. Basic politeness is critical as are solid social skills and interpersonal abilities.
General Plumbers vs. Remodeling Plumbers
The general plumber is the one you call when your toilet is stopped up, when a pipe breaks or when your bathtub faucet won’t stop leaking. In order to establish a good relationship with your plumber, have him come out to fix non-urgent problems like that leaky faucet or that smelly drain. It is easier to get emergency help from a plumber if you establish a working relationship with him first.
The general plumber will also be your emergency contact when Murphy’s Law kicks in. In an emergency, expect to pay high costs. The plumber will be charging you for his time driving there, any parts needed and for the duration of the job itself.
Drain cleaning services are especially costly. You can expect to pay around $70 an hour for drain lines and nearly twice that much for sewer lines. Weekend and night calls will cost even more. Basic plumbing jobs like replacing drain traps or repairing a minor leak will range anywhere from $45 to $65 an hour in addition to parts. If you make a call on a weekend or at night, you can pay as much as $100 just for him to come out to your house and $75 an hour after that.
Remodeling plumbers specialize in remodeling and remedial labor. The remodeling plumber will be especially careful with working with finished environments and will take care to protect carpeting and floors while working. In a case like this, you will want to work with a plumber who is vetted by a general contractor. A simple error such as failure to properly solder a joint can result in a multi-thousand-dollar repair. Because so much depends on how well the plumber does his job, the contractor is only going to hire those he can trust.
A remodeling plumber will typically charge between $45 to $65 an hour, including parts. However, more and more plumbers are charging “per fixture” rates based on drain locations, fixtures like toilets and bathtubs and supply lines.
In-person Quotes and Fixed/Hourly Rates: The Importance of the Distinction
If the plumber offers you a quote over the phone, think twice about hiring him. A good plumber will want to see the project himself before giving you a price to avoid quoting you too much or too little. A good plumber will also include the price of any estimated parts needed to complete the repair in the quote.
You can ensure that the plumber has done so by asking him if the estimate includes parts and labor. Most companies will offer you a free estimate to help secure your business. Ask for a breakdown of all costs in writing when receiving the final estimate.
Some people look for the cheapest prices when choosing a plumber to service their homes. While this might be necessary for extreme circumstances, you should not make a habit of this practice. Plumbers who underbid on projects are likely to cut corners in ways that you might not even be aware of until a problem crops up later on. A plumber who charges more is not necessarily trying to scam you. Compare estimates to see if the quote you were given is reasonable. A minimum of three different quotes is a good way to gauge the ballpark figure for a repair.
Pinching Pennies: Saving Money on Plumbing Jobs

You are paying for each minute of time the plumber spends at your home. Wasted time equals higher costs. To help make the job go faster, you can prepare in advance.
- If you can, have the plumber complete all the needed repairs in a single stop. This will save money on additional trip charges and the difficulty of scheduling multiple visits.
- Before the plumber arrives, have a list ready of all the areas you’d like him to check. If you don’t know what the problem is, be prepared to describe the situation.
- Have the work area cleaned and free of clutter.
- Try to schedule your day so that you are not in his way while he is working.
- Take care of clean-up yourself. Obviously, if hazardous materials are involved, let the professionals do the job. However, easy and safe messes like dirt or debris can be handled on your own.
- Some minor jobs you can repair on your own if you are savvy with tools. Practicing simple maintenance techniques and maintaining your plumbing can help avoid costly or emergency repairs down the road.
- Install water-saving plumbing fixtures: The amount that you pay for water and sewage treatment is partly dependent on your usage. Reducing your water consumption can help you save big dollars. Don’t skimp when it comes to making plumbing repairs. If you have an older toilet that drinks water like a humpback whale, invest in a new one. Rather than spend your money on a stream of repairs, consider making any replacements with quality parts over cheap or inexpensive ones.
- Buy your own parts and plumbing fixtures: If you want to save money on plumbing fixtures, consider buying your own. In most cases, plumbers buy the parts themselves at a discount and then charge you full prices to cover operating costs. In recent years, plumbing fixture costs at home improvement centers have dropped and are at times lower than the prices that contractors pay their suppliers. If you have the time, you might be able to save by buying your own. This YouTube video by a master plumber will give you some suggestions on how to locate quality plumbing fixtures.
Keep in mind that, if you buy the parts yourself, there can be conflict about whose responsibility it is if something goes wrong during the installation process. To mitigate this eventuality, you can ask the plumber which brands he uses. Be sure that the parts you buy have a warranty on them so that you are covered in the event something breaks or malfunctions.
Conclusion
When choosing someone to do a plumbing job in VA, it’s important to do your homework and ensure that the plumbers’ services you select will get the job done and do it well. Consider using the above tips on how to select a good plumber when evaluating your next tradesman. Star Plumbers looks forward to working with you!

Plumbing Fixtures Maintenance Tips to Save Costly Repairs
Think about it: the bathroom is probably the most frequently used room in your home. It's the only room that must be used by each individual multiple times a day. And, it's the room where the most can go wrong. If you don't keep your plumbing fixtures well maintained, a plumbing emergency could easily arise.
Why Spend Time On Maintenance?
While the bathroom may be the most frequently used room in your home, it usually doesn't receive the amount of care and maintenance it deserves. It gets cleaned every so often, sure, but how many of us perform routine maintenance on our plumbing fixtures?
It might seem unimportant, like addressing a problem that hasn't arisen, but the reality is that performing routine maintenance keeps your bathroom fixtures in good condition. It can keep you from having to hire a professional plumber to fix emergency situations. Keeping your fixtures in good working order by performing routine maintenance is the best way to save yourself the time, money, and frustration of having to hire a plumber.
Often, people opt for hiring a plumber because they feel like they are not adequately equipped to care for their own plumbing needs. However, with a couple of tools and a bit of direction, you can take care of most plumbing issues on your own. But, the best way to stay far away from plumbing issues? Practice these maintenance tips to keep your fixtures in tip-top shape and functioning perfectly. If you work to keep everything in good order, you won't have to call the plumber quite so often.
Going for Grout
When working on your bathtub or shower, it's usually important to have quality caulk on hand. If you have tiles either on the walls of your shower, they usually are sealed with caulk or grout. If you have a bathtub, the tiles will often be sealed to the edge of the tub using a thick bead of caulk as well.
Make sure that the grout is solid. As grout ages and dries, it can crumble away or develop holes in spots. You will want to fill in any holes and smooth out the caulk so it creates an effective seal. This seal is what keeps water from seeping into the walls behind your shower, growing mold, and doing other damage.
It's best to re-caulk your whole shower area once a year. Still, you should regularly check the grout for any holes and fix them immediately. There's no way to know how much water is getting through a crack, or how much damage is being done to your home. Regular caulking helps to keep the damage at a minimal.
Grout often starts off as a white color, but as it stays along with the tiles of your shower, it grows green and brown. This is from collecting dirt, grime, and other residues, and sometimes growing mold, as you use your shower. The damp environment encourages mold growth, and this can eat away at the caulking. There are several different types of grout you can choose from that give your bathroom a seal with style.
To keep your grout in good condition, even if it doesn't have any holes that require caulking, you should try to clean away the mold, mildew, and other grime from the grout. One of the most efficient ways to do this is with a toothbrush. Use a toothbrush and grout cleaner to scrub vigorously over the grout between your tiles and connecting your tub to the wall.
Keeping your grout clean will help you have to fix caulking issues far less often.
Shower-head Maintenance
Most houses use tap water that is considered "hard water," because it contains hard minerals that can build up in your pipes and showerheads. This can cause your showerhead to develop uneven spray patterns to make up for clogged holes. But, not to worry, get rid of that grime and build-up only takes a couple of steps.
First, unscrew the swivel ball nut using pliers or a wrench that is easily adjustable. If you want to ensure that you protect your shower-head for any scratches, you can use masking tape to wrap around the jaws of your pliers, covering the sharp areas that are likely to cause scratches. Then, unscrew the collar nut from the shower-head. Then, clean the holes of the shower-head with a thin wire. By poking the wire through each of the holes, you will be able to dislodge any built-up blockages.
After cleaning each of the outlet and inlet holes thoroughly, flush the shower-head with clean water to remove any dislodged materials. To give the shower-head a deeper clean, you cansoak it in vinegar to remove mineral deposits. Put one cup of vinegar in a plastic bag, and place it over the showerhead, using a twist tie to hold it in place. Or you can let the shower head soak while it is still disassembled. Let it soak in vinegar overnight, using a twist tie to hold it in place. In the morning, remove the bag and use a damp cloth to wipe off any mineral deposits.
Shower Doors and Curtains

Shower curtains and doors can easily get filthy if you aren't paying attention. Any time you notice a white film or a dark mold starting to grow, it's important to attend to it. Usually, this kind of film or mold starts at the bottom of the door or curtain, because it has the most contact with water.
Pull out the curtain or door and scrub it down with an abrasive cleaner. If your shower has a door, check the tracks for evidence of mold or for standing water, which will eventually lead to mold. If you do have standing water in the tracks, try to drill small holes in discrete areas of the track that will allow the water to flow back into the basin of the tub. Make sure you angle the drill to promote water flow. These are aptly named "weep holes" because they make it appear as if the shower is slowly weeping.
Faulty Faucets

Keeping your faucets well-maintained is important for a successful experience in the bathroom. The moving parts of a faucet can wear down over time pretty easily, so they might require more maintenance than other plumbing pieces. One of the most common issues with faucets is a leak, which often can be fixed by make a few adjustments.
It's very important to repair leaky faucets immediately. According to professionals, there are four common reasons for leaky faucets. It helps to prevent further damage to the mechanical fixtures in the faucet, as well as saves you money. The Environmental Protection Agency estimates that a faucet that drips at a rate of one drip per second wastes at least 3,000 gallons of water every year. That's the equivalent of what's needed to take over 180 showers. Letting all of that water drip down the drain is a waste both monetarily and environmentally.
Leaks aren't all you have to watch out for with faucets, however. Just like shower-heads can have a build-up of minerals from the water passing through, so can faucet aerators. According to Think Tank Home, a leader in all household appliances, a buildup of sediment and lime can be a primary cause of low water pressure in your pipes. This build-up also works to clog the small openings in the faucet and aerator.
To clean the aerator, carefully unscrew it by turning it counterclockwise by hand. If you have trouble getting the aerator to unscrew using your hands, wrap the jaws of your pliers with masking tape to protect the aerator and loosen it with the pliers. Once you've gotten it a bit loosened, continue by hand. According to professionals, taking your faucet apart in order to fix internal mechanisms can be much easier than it seems.
Once it is unscrewed, take the aerator apart so that you can effectively clean each piece of it using a small brush. Like with the showerhead, vinegar will remove sediment and lime build-up from the small holes in the aerator. Reassemble the aerator and screw it back onto the faucet.
Down the Drain
According to Dr. Charles Gerba, a microbiologist, and professor at the University of Arizona, it might surprise you to know that bathroom sinks are often dirtier than kitchen sinks. Sure, kitchen sinks see all the food waste, but they have built-in disposals and bacteria to help break these things down. When it comes to our bathroom sinks, however, we simply expect things to flow smoothly. Until they don't.
Clogs are some of the most common bathroom issues, and ones we love to avoid. According to professionals in the field, hair is the most common cause of clogs in bathroom drains. As often as you can stomach it, pull out the drain stopper from your bathroom sink and bathtub, and clean it thoroughly. Remove all the hair and other bits that are stuck to it, scrub it off, and soak it in vinegar. Then, throw it in the dishwasher. This should remove the mold and other gunk that builds upon the stopper. To keep your sink drain clean, scrub your sink at least once a month.
To keep your pipes working at their best, take time every week to run hot water down the drain to help keep it free-flowing. The heat and pressure should be enough to break through the weaker clogs. Once a month, you should use drain cleaner in your bathroom sink and bathtub drains. Most drain cleaner works to both break up existing clogs and sticks to the sides of the pipes to help promote an unclogged flow in the future.
And of course, the best way to prevent clogs in your bathroom sink or bathtub is to avoid putting things down the drain that doesn't belong there! If you happen to have long hair or shed a lot of hair, try using shower drain attachments that help to keep the hair from going down the drain.
Toilet Talk

You might not know that your toilet can be a primary source for bathroom leaks. To ensure that your toilet isn't leaking at all, start by checking the toilet tank's water level. You want to make sure that no water is running into the overflow pipe, located in the center of the tank.
If you do find that water is running into your toilet's overflow pipe, you can fix it by slowly adjusting the fill valve and allowing the water level to lower. You want to water level to be about one inch below the overflow tube to ensure no water enters it. You can eyeball about an inch when adjusting the water level, but lots of toilet tanks actually have a mark showing the correct water level. This professional gives thorough instructions on how to adjust your fill valve to keep your toilet from overflowing. If you want to test your flush valve mechanism and make sure your water level is correct, there is an easy test. Grab some food coloring from the kitchen and put a couple of drops in the water tank. Don't flush the toilet, and let it sit for ten to fifteen minutes. If after that time, your toilet bowl water is still clear, you're in the clear. If some color has seeped into your toilet bowl, however, it means that the toilet tank is leaking. Usually, this is due to an issue with the ball or flapper and can be fixed by a simple replacement.
Small amounts of water will often begin to seep out of the base of your toilet. Every once in a while, take a rag and run it along the base of your toilet to ensure that water is not exiting through the base. This can be an early sign that the sealing ring at the base of your toilet is worn and should be replaced. If you see small amounts of water seeping out of the bottom of your toilet, don't blow it off. It means that much bigger leaks are on their way. According to Lowe's, you can replace the sealant ring around the toilet, but this may be a quick fix that doesn't attend to the bigger problem.
Another tip for keeping your toilet and plumbing in good shape is to only flush appropriate matter down the toilet. Many of us use the toilet as a type of disposal. It's an easy way to get rid of extra bits of food or paper, or other things that are biodegradable and you can easily assume would break down. But using your toilet in this manner can lead to clogs and broken pipes.
Shifting Seasons
According to professionals, the changing of the seasons and temperatures can put an extreme amount of stress on your pipes and plumbing. This, of course, can lead to many plumbing problems. The extreme changes in temperatures force the pipes, and all other metal fixtures, to expand and contract, which can lead to leaks, cracks, and lots of other issues. As each season changes, you'll need to do some basic checks and maintenance to keep everything in working order.
What About Winter?
Winter is perhaps the season that puts the most stress on your pipes and plumbing system. Direct Energy has tips for how to keep your home's indoor and outdoor pipes in good condition, even in the severe cold. When the temperatures drop, the plumbing problems skyrocket. Winter is a primary issue for pipes during the cold months, and they can cause massive problems in your bathroom. When water freezes, it expands. And when it does, pipes burst. When it comes to winter, this is the biggest headache for plumbing issues.
You may think that this can't create plumbing issues in your bathroom, but that isn't the case. Even though the pipes in your bathroom are less likely to freeze because of their position indoors, they still can during extremely cold periods. Likewise, frozen pipes in other parts of your sewage system can create backups and messes in your bathroom.
To best keep your pipes moving and avoid a bathroom issue, heat your entire home, not just certain rooms. Allowing warm air to circulate through your home helps to keep your pipes warm. If you have cabinets that house bathroom pipes, leave the cabinet doors open to allow warm air inside.
You will want to insulate both warm and cold water pipes that are in areas that are vulnerable to freezing. Try your best to eliminate drafts in the home, and check areas around water pipes to make sure they are not housed in particularly drafty areas. At regular intervals, allow water to run from each valve. The movement will keep the pipes from freezing. If you are experiencing extremely cold temperatures, you might want to allow a continuous small trickle from each faucet to keep the pipes from freezing.
(Don't)Spring a Leak

As spring trickles in, you need to check all your plumbing to make sure it's in working order. Drains are essential to effective spring plumbing because the moisture that has been frozen solid for a season will begin to melt.
Spring is the time to check for slow leaks around your house. This sounds like a challenge because slow leaks are especially insidious and difficult to detect. You can check for these leaks, however, by taking a water meter reading. Then, avoid using your water for a couple of hours. After about two hours, take another water meter reading. If the reading changes, there is a leak somewhere.
Check all the pipes around your home for signs of leaking, like puddles or watermarks. Many leaks can be fixed by a simple adjustment, but in spring, it's also likely that a leak is due to a crack in the pipe. If this is the case, you will probably need a professional's help.
Make sure all your drains are in working order by pouring a gallon of water down the drain. If any drains are slow, you should snake them to remove any debris, and then use a drain cleaner to break through the leftover build up. For more specific tips on Spring's effect on your plumbing, check out this guide by Roto-Rooter.
Summer Days
You should have your septic system inspected once a year, and summer is a perfect time. The ground and air are warm, which makes the plumber's work easier. Summer brings with it its own plumbing problems. Water from heavy storms can seep into cracks in your sewer system and cause back-ups. According to professionals in the field, what you can expect from your septic system inspection depends on what kind of septic system you have.
To make sure your summer plumbing is working at its best, make sure you get your septic system pumped when it's needed. If you aren't sure when the right time for a septic system pump is, you can ask your plumber during your yearly septic system inspection. If you have any stoppages in your pipes, keep track of them, and of the times in between them.
Tree roots are a common issue with sewer lines. In fact, experts say that they are one of the most common external problems with sewer systems. They can grow to break or otherwise damage your underground pipes. If you have tree roots that cause problems regularly, schedule regular sewer main snaking to keep your pipes from developing blockages. If trees become enough of an issue, consider having those trees removed to avoid future plumbing problems.
Conclusion
Whether you consider yourself to be handy or not, there are plenty of easy plumbing maintenance practices to keep your home's appliances working at the height of their abilities. It's easy to get discouraged when dealing with problems in the home, especially when you feel like you don't have much in the way of knowledge or experience.
But the easiest way to fix plumbing issues isn't to fix the issues at all. It is to perform basic maintenance tasks that will keep all of your plumbing working well. That way, plumbing emergencies arise far less often. If you get in the practice of working these small maintenance tips into your cleaning and home upkeep routine, you will save yourself time, money, and a lot of annoyance in the future.
Of course, if your plumbing issues do require the help of a professional, don't hesitate to reach out. While you can do a lot of easy maintenance on your own plumbing system, there are some issues that require professional help, and there's no shame in asking for it.

What Are Bathroom Fans and How to Install a Bathroom Fan Guide?
What Are Bathroom Fans?
The basic role of a bathroom exhaust fan is to remove moisture from the bathroom. It is not a pretty sight to watch water rivulets running down your walls after having a relaxing shower. It puts a bit of a damper on your day, not to mention the damage it will eventually cause to your paintwork and the ceiling surface if the steam and moisture are left unchecked.
They also can assist in controlling and removing "bathroom odors". You know what I mean. The ones you deny any knowledge of. Apart from being somewhat unpleasant, they may also contain microscopic levels of bacteria. You can always use one of the readily available "sprays" but they do nothing more than mask the smell.
Benefits Of Having A Bathroom Exhaust Fan
If you ask an electrician if you should have an exhaust fan in your bathroom, he is going to say "Yes, of course, you do". Aside from the fact he wants to take your hard-earned cash, there are benefits to having one.
Apart from helping remove nasty smells from your bathroom, consider these five other benefits exhaust fans give you.
1. Much-improved quality of air
Bathroom fans vent any humidity and dampness trapped in the room which could lead to mold and mildew that could prompt asthma attacks and breathing problems for family members.
2. Reduce Mold And Mildew
Bathtubs and shower enclosures breed mold and mildew due to the hot, wet and steamy environment they create in your bathroom. This could lead to mold-infested grout lines — the black stuff that you can't get rid of without scrubbing — and mildew in your shower, all of which could spread throughout your house.
3. A Fresher Smell

With less mold, less mildew and fewer airborne matter from your toilet, then the air in your bathroom should smell a little better.
4. Goodbye Foggy Mirrors
Foggy mirrors are great for a Hitchcock movie, but in real life, they can be a real pain-in-the-you-know-what to deal with. Wiping the mirror after a shower leaves streaks, but not wiping it down also leads to streaking. An exhaust fan will go a long way to alleviating the problem.
5. Home Maintenance Costs Are Reduced

Steam, condensation, humidity, and moisture can unleash untold problems on not only your bathroom but your entire home. They are breeding grounds for mold, mildew, bacteria and other unpleasant things and can cause destruction to your drywall, tiling, even your furniture.
These benefits and there are many more, show that having a bathroom exhaust fan installed is a good decision for your home and your family. To find out how to install a new fan or replace a broken one read on.
Is It Difficult To Install A Bathroom Fan?
When it comes to questions like how to install a bathroom fan, there are no quick and easy answers. A lot depends on whether you have one already in the bathroom or toilet and whether or not it works. A bathroom exhaust fan that doesn't work is a bit like having an ashtray on a motorbike — pretty much useless.
I Don't Have A Bathroom Fan. How do I properly install one?

Installing a bathroom exhaust fan is not the easiest of DIY projects. Almost all the work involved will mean standing on a ladder, getting a crick in your neck from looking up at the ceiling, crouching in the attic, probably dripping with sweat, and trying not to get any insulation all over you, never mind the dangers of breathing it in.
Ignoring the facts that you will, no doubt, get a sore neck, spend a lot of time in a hot attic, be going up and down a ladder, you will also have to go on the roof and be brave enough to cut a hole in it. (Best do this job when there's no chance of rain).
Apart from all the physical work, installing a bathroom fan is not all that difficult. It only involves a 120V power source, and one piece of flexible ducting, no more than six feet in length. (The longer the tube is, the less efficient the fan becomes). One thing to keep in mind, however, is that according to many building codes bathroom exhaust fans are not required.
All that is necessary is that a bathroom window is at least three feet square and which opens halfway can be a substitute for exhaust fans in many areas. The International Residential Code explains more about light and ventilation regulations in section R303. Check with your local code enforcement office for clarification.
Materials and Tools Required.
- Bathroom Exhaust Fan
- A ladder to access the attic
- Dust Mask or respiratory device
- Drywall saw or reciprocating saw
- 4 inch round flexible ducting
- Cordless drill
- 1/2 inch drill bit
- Stud finder
- Voltage tester (Touchless)
- Screws
- Electrical cable
- Wire stripper
- Round wall vent or roof vent with cap. The type depends on if you are going to vent through a side wall or roof.
- Exterior grade caulk or roofing cement
Before You Start Work.

There are a couple of things which often concern DIYers taking on this type of project. Power supply and venting. How do I get power to the fan? What about venting the exhaust? How do I get the warm, moist air out of the attic?
Since the majority of residential bathroom fans use 120v electrical lines, finding live electrical cables near your chosen position should not prove problematic.
Venting is the method used to get the stale, damp air out of the house after it is drawn into the fan. It is blown via a connected flexible duct either through a hole in the side of the house or as is more common, up and out through the roof.
A New Bathroom Fan Installation.

Since this is a new installation, not a replacement, your bathroom will not have any ducting in the attic area. However, all you need is access to the attic area above the bathroom ceiling to be able to route the flexible ductwork outside.
1. Find the correct CFM rating for your bathroom.
The first thing you need to do when installing a new bathroom exhaust fan is to find out the CFM rating for the room so you can buy the correct fan strength.
- CFM stands for "cubic feet per minute" and states how much air the fan can move per minute. Small bathrooms require low CFM fans, and larger ones may require a much higher CFM rating.
- To calculate the correct CFM for your bathroom you need to work out the room's cubic footage. Multiply the length of your bathroom by the width and then by the height. If your bathroom measures 10ft x 12ft and the ceiling are 8ft height, then the answer will be 960. Divide this number by 7.5 to get a CFM rating of 128.
- You should buy a fan with a CFM rating of at least this number.
2. Give a thought to the noise the fan will make.
The next thing to contemplate is the sound rating of a new fan. This is measured in sones.
- New bathroom exhaust fans usually have a sound rating anywhere between 0.5 and 6.0, where .05 is very quiet and 6 very loud.
- The sound level of your new fan is a personal preference. You may want a quiet fan or you may want the privacy louder fans to offer so that it will drown out your singing when you're in the shower. It is entirely up to you.
- The sone rating, like the CFM, is printed on the box of your new fan.
3. Find your power source.
The fan will be installed in the ceiling of your bathroom, so you need to get power to the point where it is to be situated. You may be able to tap into the circuit for the bathroom lights — check your local codes to see if this is allowed.
4. Choose the right location for the fan.
The fan's location is important. It should be installed midway between your shower/tub and toilet to ensure the best ventilation.
- Installing a new fan means considering the layout of your attic where the majority of the fan assembly unit will be located. It needs to be placed in the space between two joists free from any obstacles like pipes or cables.
5. Get all your tools together.
With a little knowledge of basic electrical and woodworking skills, the installation of a bathroom fan is well within your capabilities. Before you get started it is wise to have all the tools and materials needed for the project readily accessible.
- From the list provided above, have the tools all within easy reach in the bathroom, since that is where you will start. Items like the ducting, dust mask, vent cap, and a reciprocating saw can be left near the attic hatch until you are ready to go into the attic.
6. Installing the fan.
- The fan will come with instructions for the installation. Read them carefully before you begin.
- With the position of the fan-selected, use a stud finder to locate the ceiling joists. If the chosen location happens to be in line with a joist, then you will have to move the location slightly to avoid hitting them.
- If your fan comes supplied with an installation template, use that to mark where the holes need to be. If not, then trace around the fan housing with a pencil, then using a drywall saw, cut along the lines carefully and remove the piece of ceiling drywall.
- Go up into the attic, taking the fan housing, a light, cordless drill, screws and electrical cable.
- Place the fan housing in the hole you have cut in the bathroom ceiling so that the bottom is flush with the ceiling. You will need help with this step since you can't see the underside of the ceiling.
- If you can, screw the fan to the side of a joist to secure it. If not, then if the fan came with suspension brackets, use them. You can always purchase the brackets separately if the fan doesn't come supplied with them.
- Since you are in the attic, fit the cable through the side of the fan housing, leaving approximately 7 - 10 inches extending into the housing.
- With the power off to the bathroom circuit, locate the junction box which supplies the lights to the bathroom, and removes the cover.
- Remove the wire nuts to expose the colored wires, and splice in the new wiring from the cable you have fed into the fan housing. If necessary, knock out one of the spark plugs in the box to allow you to feed the cable through.
- At this point, you will have to strip the ends of electrical wires to allow you to make the connection using a good wire stripper.
- Twist the new wiring to the existing and put wire nuts over each pair of wires, making sure the colors match (red to red, white to white, black to black, etc.)
- Make sure all the wires are secured to each other before replacing the junction box cover.
- Use the screws that held the junction box in place to the joist to prevent any movement.
7. Cutting a hole in the roof.
It's crunch time. You now have to cut a hole through the roof to allow the roof vent and tailpipe to go through.
Before you leave the attic to go up on the roof, drill a small hole through the roof as close to the position where the fan is going to be, if possible, vertically above the fan housing. Push a piece of wire through the hole to show you where the cut-out for the vent cap needs to be.
NOTE: You will spend a good deal of time working on your roof when you install an exhaust fan, so you need to exercise caution when climbing onto the roof, and while you are actually working there.
- Locate the wire sticking up through the roof and put the vent tailpipe over it.
- Trace around the vent tailpipe, just large enough for the pipe to fit.
- Drill a hole large enough for the saw blade, then using a reciprocating saw, or keyhole saw, cut out the circle.
- Remove the shingles from around the hole without causing damage to the underlying roof membrane.
- Install the roof vent by sliding the topmost flange under the shingles above it and placing the bottom flange on top of the lower shingles.
- Secure the vent flanges with roofing nails before replacing any shingles, working from the bottom up and sealing the shingle joints with roofing cement.
8. Connecting the fan to the ducting and power.
- Go back inside the attic and connect the flexible ducting to both the roof vent and the fan, slipping clamps over both ends and tightening them to secure it. Wrap the joints with duct tape.
- Following the instructions supplied with the fan, run the cable to the fan and also to the switch. You can drop the new cable down the wall cavity to the existing light switch for ease of installation.
- If you are installing a fan with a light, you will need to use a three-wire cable from the switch to the fan, following the diagram included in the fan's installation instructions.
- Connect the wiring as per the instructions and when completed, plug the fan motor into the built-in receptacle.
- Attach the fan grille to the housing. Turn the circuit breaker back on, return to the bathroom and test the fan by turning on the switch.
If everything has gone according to plan, you should now have a fully working bathroom exhaust fan. If something is wrong and the fan isn't running, you need to go back and check your work. Are the electrical connections correct and secure? A loose wire somewhere perhaps? The simplest of things are often found to be the problem, but in the end, you will be satisfied with a job well done.
This video will show you how to install a bathroom exhaust fan if you need visual tips on the procedures.
How To Install A Replacement Fan

If you have an existing fan in your bathroom which either doesn't work or is not working properly, then a replacement fan assembly is your answer. First, remove the fan's grille to find out what size of the fan is installed. Measure the internal dimensions of the housing so that you can purchase a fan of the same dimensions.
A lot of fans have the make and model on the grille face or somewhere inside the housing. If you can get this information, you may be able to buy a direct replacement.
1. Remove The Old Fan's Cover.
The cover is the part of the fan you see on the bathroom ceiling. Some will be held in place by screws, but more often than not, they are secured by two spring clips. Pull the cover down until the clips are visible and squeeze them until they are released, exposing the fan housing and motor assembly.
2. Disconnect the fan's power.
With the cover removed, disconnect the fan's power lead. If you see wires coming from the ceiling to plastic connectors, then STOP. Go to your breaker box and find the one marked for the bathroom fan or all the power to the bathroom.
3. Test the power is off.
Using a non-contact voltage tester, a test that there is no power in the fan's wiring. If the tester shows all power is off, then it is safe to proceed. Disconnect the power lead from the built-in socket or remove the plastic connectors and untwist the wires.
4. Removing The Fan Assembly Unit.
The fan motor assembly may be secured with screws, or the whole motor unit might have clips on two sides keeping it in place. Either way, remove the motor assembly, leaving the fan housing attached to the ceiling joists. If, on the other hand, there is no way to remove just the motor unit, you will need to remove the whole fan unit, housing, and the vent pipe.
5. Disconnecting the fan, the difficult way.
Assuming the motor unit and fan assembly won't come out as described above, then you will have to do it the hard way. This means getting into your attic, finding the vent pipe and detaching it from the fan housing, and removing the screws that hold it in place.
- Put a piece of plywood or some other sturdy material across the joists to support you.
- With the power turned off, disconnect the wiring to the fan from the junction box.
- Get someone to help you by holding the housing while you remove the fasteners.
- Once the fasteners have been removed, pull the complete fan housing out of the ceiling.
6. Install the new fan.
If the new fan you have just purchased has the same dimensions and connections like the one you removed, then you can simply reverse the procedures, inserting the housing into the ceiling, connecting the vent pipe, securing it in place, reconnecting the wiring and restoring power at the breaker box.
If luck isn't with you, and you had to buy an exhaust with slightly different dimensions, then you will have to adjust the ceiling hole accordingly. If the new fan has a larger housing than before, trace the outline of the housing on the ceiling and enlarge the hole. Smaller housings can also be installed but you will have to patch the drywall to fill any gaps left in the ceiling drywall.
7. Making connections.
- Looking on the bright side, the vent pipe may have just enough slack on it to allow you to connect the pipe to the housing duct connector before you push the housing up into the ceiling. If not, then it's back up into the attic.
- Attach the new fan's housing to the ceiling joists. Read the instructions provided with the fan to see which method is needed to secure it.
- Some fans can be screwed from the bottom into the joists. Others may have brackets only accessible from the attic.
- Connect the electrical wires from the fan housing to the corresponding color-coded wires in your attic that powered your old fan. Make sure you join the correct wires, white to white, black to black, etc. securing them with wire nuts.
- Once all connections have been made, it's time to test the fan. Flip the breaker back on. Turn on the fan's switch and listen for any loud or unexpected sounds. If you hear anything other than the fan running, or if it doesn't run at all, kill the power and check your work.
- If everything sounds and looks okay, then switch the fan off and put the grille on.
Congratulations. You've replaced a useless fan with a functional exhaust fan, which will remove all the steam, condensation and whatever from your bathroom.
With all the information provided above on how to install a brand new exhaust fan in your bathroom, or replacing an existing, outdated or broken fan, you should be able to tackle this DIY project with confidence, knowing that you can get it done.
It may take a little time to get all the tasks completed, but in the end, when you are celebrating with your favorite cocktail or long neck, you can say to yourself — "I did it, and I saved myself a lot of money."
The average cost to have a bathroom exhaust fan installed can be anywhere from $200 to $600 depending on your location. Now that's worth thinking about.

How Much Does Sump Pump Repair Cost?
Your home’s sump pump plays a critical role in protecting your home from the elements. Without a functioning sump pump, your home would flood during storms and face issues like basement flooding and damage the foundation. The hard work of keeping your home dry can eventually take a toll on the pump, resulting in breakdowns and repairs.
When your sump pump has a problem, how much does it cost to repair it? Before we jump into how much it costs to repair a sump pump, let’s look at a few common problems and signs that your sump needs to be repaired.
Common Sump Pump Problems
When your sump pump runs into trouble, there’s a good chance it’s caused by one of a few common problems. The exact nature of the issue will determine how expensive the repairs are. A worn-out motor is the most common sump pump problem. However, electrical problems and wiring issues are also common in sump pumps. Let’s take a look at the most common problems and how much it cost to fix them.
Signs Your Pump Needs Repairs
Before you have to pay for a professional sump pump repair service, there’s a good chance your unit will give you some warning signs that something isn’t right. While some of these symptoms will be obvious, others may remain under the radar until your annual maintenance appointment.
What are the signs that your sump needs repairs? Take a look at the list of red flags below. If you notice any of them in your own home, call a sump pump expert ASAP. A knowledgeable technician can inspect the unit, diagnose the issue, and make the necessary repairs.
It’s important not to attempt fixing the problem on your own if you don’t have prior DIY repair experience with sump pumps. The combination of water and electrical equipment found in a sump pump can be extremely dangerous for novices and newcomers.
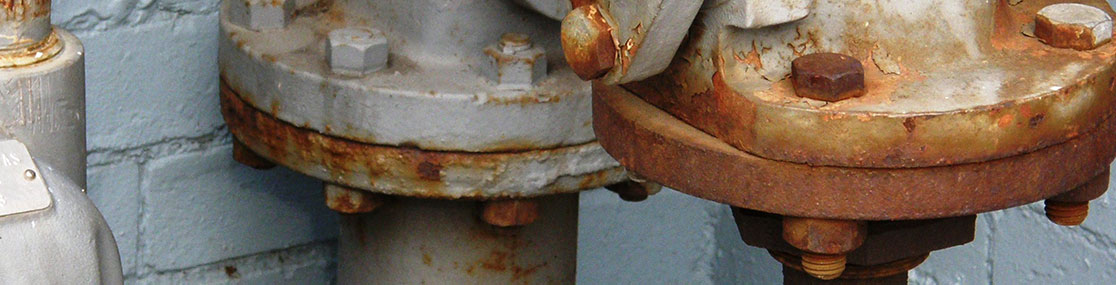
1. It’s beginning to rust
Sump pumps are constantly exposed to water, which can lead to components rusting. This is especially common with older pumps since many newer units are built using rust-proof materials. If there’s only a small amount of rust, you may be able to simply scrub it away. However, extensive rust can eat through components and cause structural weakness to key components. In this case, you should schedule a professional repair service.
2. It’s making strange sounds
Your sump pump should be relatively quiet. If you have a pedestal model, it will naturally be a little louder than submersed units, but it should still be mostly silent. In either case, you’ll probably notice if your unit starts making noises that it’s never made before. Humming could mean you have a jammed impeller or a clog in the airlock. Loud clanging or banging, especially in an older model, could mean it’s time for major repairs or a full replacement.
3. It’s totally dead
A non-functional unit is a major problem. Unfortunately, you’re most likely to notice this after a heavy rainfall, which is also when you’re most likely to see flooding and damage. This is a critical situation that requires professional repairs ASAP. Locked-up or burnt-out components may be to blame, or the sump pump may have reached the end of its lifespan.
4. It’s getting stuck or jammed
Jams are common and are typically inexpensive to repair. In fact, you may be able to fix minor clogs like those caused by collected debris all on your own. An overly dry water pit can also cause the unit to get stuck. If your area is experiencing a dry spell or drought, you can dump some water into the pit to keep it from locking up. But if you’re experiencing a drought and notice a bad odor, that’s a sign you need a professional to come out to clean and test your unit.
5. The wiring is failing
Sump pumps are powered by electricity, and oftentimes their wiring fails and needs to be fixed or replaced. Chances are your sub pump is wired into your home’s electrical system, so the pump is also susceptible to shutting down if your power fails. Not only can this lead to a flooded basement, but it can also put an undue strain on the sump pump when it finally kicks back on. Plumbers refer to this as the pump being “overwhelmed.”
The pressure of handling a backed-up amount of water can be so great that it damages the pump. To avoid these issues, many homeowners invest in a backup generator or battery to keep the pump going. A sump pump battery costs around $150 and is cheaper than repairing a burned-out unit.
6. It’s running constantly
It’s natural for your sump pump to run more frequently when it’s raining, but it shouldn’t need to run 24/7. Usually, this occurs when the pump is struggling to keep up with the amount of water. The cost of repairs depends on how much damage has been done to the motor and how you would like to address the issue in the future.
The problem could be as simple as getting a new float switch. Float switch repair costs between $35-$75 in addition to the cost of labor. If the motor burns out, you’ll have to get a new one. Having a new motor professionally installed will cost between $60-$200. To prevent the same thing from happening in the future, you may want to add a second pump. The cost of installing a second pump ranges from $100-$500 depending on the style and how extensively the plumber needs to dig.
7. It’s reached the end of its lifespan
Sump pumps don’t last forever and will eventually need to be replaced. The average lifespan for a sump pump is between 7-10 years. As your home’s pump ages, repairs will likely become more frequent and more expensive. There may come a point where it makes more financial sense to simply replace the system instead of constantly repairing it.
Average Cost to Repair A Sump Pump

Now that we’ve discussed the most common sump pump problems you’re likely to run into, let’s discuss the cost of getting those issues fixed. According to the experts, the average cost of repairing a sump pump is $450, but the price can run anywhere from $100-$1,1100. That’s a huge range! We’ll break down the different factors that influence the cost of repairs so you can get a better understanding of what you can expect to pay.
A big part of this variation is due to the fact that handymen charge per hour and their individual rates can vary drastically. Plumbers’ hourly rates for this type of work range from $45-$65/hour. The simpler your unit is and the less invasive the repairs, the lower the cost will come out to.
The biggest factor for repair cost is the type of sump pump you have. There are two main types: a pedestal sump and a submersible sump pump. Let’s take a look at the difference and how it influences repair costs:
Pedestal-style Sump Pump: $100-$500
Pedestal pumps are the simpler of the two styles in terms of design, which means they’re also cheaper to repair and replace. Repairs are easier to perform because the pump motor sits on a stand above the water. In fact, homeowners may be able to perform minor repairs and maintenance on their own. However, we still recommend having a professional do an annual inspection of the unit to detect any trouble that’s brewing before it becomes a full-blown problem.
Submersible-style Sump Pump : $200-$1,100
Repairing a submersible unit is more detail-oriented and expensive than fixing a pedestal pump. This is due to the fact that a submersible pump, like the name implies, is submerged below the water. To keep the pump safe from water damage, it’s enclosed in a tough, waterproof case. It functions by drawing water up from below and dispersing it through the pipes. Be prepared to call out a professional repairman for even minor issues, since fixing the pump yourself could be dangerous.
The nature of the issue and the extent of the damage will ultimately determine the price of repairs. An issue with the interior drainage system, the wastewater pipe, or the electrical system will raise the price of repairs.
Average Cost to Replace a Sump Pump
The most extreme form of repair is sump pump replacement. This is your best option if your sump pump is old or if the cost of repairs is over half the price of a new sump pump. The cost of replacing an existing sump pump is much cheaper than installing a pump for the first time. Professional replacement will cost between $400 and $1,1000. Of course, the price you end up paying will vary based on what kind of unit you have and the cost of labor in your area.
What Factors Affect the Cost of Sump Pump Repairs?

There are a few important factors to take into consideration when determining how much repairs will run. Extensive rust and old-age are two factors that seriously drive up the cost of repairing a pump. That’s because these two conditions are indicative of extensive--and sometimes irreversible--damage. Whether you choose to repair the pump you have or invest in a replacement pump, you should be prepared to shell out a significant amount of cash.
Type of unit: The type of unit you have significant affects the cost of repairs. An above-ground unit called a pedestal pump is cheaper to repair since the components are situated above the waterline. Another popular kind of unit, called a submersible unit, is much more costly to repair since the machinery is submerged below the water.
Age of unit: You should also factor in the age of your unit. Pedestal-style pumps usually last around 10 years while their submersible-counterparts have a shorter lifespan of roughly 7 years.
Older units are harder and more costly to repair because they’re reaching the end of their service life and are becoming less and less reliable as they age. You may find yourself in an uphill battle where you’re replacing one part only for another to fail a short time later.
Be sure to compare the price of repairs against the cost of a new unit. If the repairs are slated to cost more than ⅓ of the value of a brand new unit, then you may want to opt for a replacement.
Regional price differences: Your location also impacts how much you pay to have your sump pump fixed. Everything from the regional cost of living to local labor rates and regional insurance requirements will factor into the final cost of service. Cost of labor is typically cheaper in rural areas than in cities. The price of permits also varies widely between municipalities. A repair job that costs $300 in a city may cost only $250 in a small town or rural community.
Pump Location: The pump’s location in your home can influence the cost of repairs, depending on how it affects accessibility and ease of repairs. Pumps should be located at the lowest point of your house. This is typically the basement, but in homes with no basement, it may be a cellar or crawlspace. If the pump is difficult to reach or surrounded by dense plumbing, the repairs will be harder to carry out and therefore more expensive.
Pro or DIY Repairs: A major factor in the overall cost of repairing a sump pump is the price of labor. If you’re feeling handy and want to give DIY repairs a try, then you only need to pay for the price of parts. Hiring a professional plumbing company is going to be a lot pricier since you’ll also need to pay the hourly labor costs of a skilled, licensed pro.
Your decision shouldn’t only be about dollars, though. Attempting to repair a sump pump with no prior skills or knowledge of how they can be dangerous due to the risk of electrocution. Not to mention, doing shoddy repair work can damage the pump further, resulting in pricier repairs. To have the job done correctly the first time, skip the DIY and call up the professionals.
Pump Material: Both styles of the sump pump are available in either plastic or metal constructions. Plastic pumps are a popular choice because they’re cheaper, lighter, and better at moving coarse liquids like water containing heavy silt. However, they’re not as adept at handling high pressure, so they’re not the right fit for everyone.
Metal pumps are tougher and last longer but cost twice as much as plastic. https://www.thisoldhouse.com/ideas/your-sump-pump-ready-spring will run $150-$300 while patching-up a plastic pump will only set up back $75-$200.
Type of Floor: While the type of floor in your home seems unrelated to your sump pump, it can actually impact how much it costs to repair the pump. Most basements have floors of gravel, dirt, or cement. Dirt and gravel floors are much easier to work with if the repair technician needs to dig around to fix the problem. Cement floors, on the other hand, need to be drilled or chiseled through, which means a lot more labor. Repair work performed in a cement-floored basement can cost up to $1,000, while installation work for a second pump can rise as high as $5,000 for the new unit.
Cost-saving strategies

While there are certain cost-related factors you can’t change, one thing you do have control over is who you hire to carry out your pump repairs. Many plumbing companies and handymen offer free estimates for their work, but others will charge you for that time. You can save some cash by working with companies that offer free estimates. Be sure to get offers from two or three reputable local contractors so you can get the best deal for the pump repair job.
What You Need to Know About DIY Pump Repairs
Don’t whip out your tool kit just yet! Before you decide to cut down on pump repair costs by doing them yourself, there are a few important considerations to make. If you don’t already know your way around a sump pump, you should seriously consider calling a professional for service.
While it’s technically possible for a homeowner to do minor repairs to the pump, keep in mind that sump pumps are electrically-powered devices covered in water. This is a recipe for electrocution. The risk of shock is much higher with submersible units.
Homeowners should never attempt DIY repairs on submersible units. Instead, they should call a service professional who is experienced with working safely with electrical and plumbing equipment.
How much does preventative sump pump maintenance cost?
An often-overlooked factor that impacts the cost and frequency of pump repairs is maintenance. Professional maintenance once a year can extend your pump’s lifespan and reliability. It also makes it possible to catch and repair minor issues before they worsen and damage other parts of the unit.
Minor repairs like those uncovered during maintenance appointments will help ensure that your pump reaches its full lifespan. Yearly maintenance typically runs between $150-$250, depending on the style of your pump. Avoiding off a costly, unexpected replacement is well worth the price.
There are even a couple of easy maintenance steps homeowners can do themselves to make sure their pumps are ready for rainy weather.
Other Considerations
There are a few other factors that influence the cost of pump repair services. Here are a few other things you should factor into the cost:
Insurance: Some insurance policies cover sump pump failure and repairs. It’s not something that’s typically included by default, so you’ll most likely have to request your insurance company to add it to your coverage. If your insurance company doesn’t cover it, you can purchase it separately from the National Flood Insurance Program. Insurance coverage will defray the costs of pump repairs and replacements, so you have to pay less out-of-pocket.
Filters: Filters can help prevent damage to your sump pump and reduce the frequency and costs of repairs. The sediment and other detritus your pump sucks up can cause clogs and wear out components that will need to be fixed. Filters are a low-cost investment at $15-$25 per unit.
Maintenance: If you live in a part of the country where winter weather drops below freezing, you should do a bit of extra preventative maintenance to make sure your sump pump survives the cold weather. Many sump pumps contain a hose that diverts water away from the pit. During extreme cold, water sitting inside the hose can freeze and form a plug. When additional water tries to drain through the hose, it backs up and floods your basement. This not only damages your sump pump, which will require professional repairs but can wreak havoc on your house as well. A new sump pump hose will run between $15-$60 depending on its length and quality.
Reserve Pumps: Reserve pumps are common in areas that are flood-prone and receive heavy rainfall. The reserve pump is a backup up that kicks in when your main pump is overwhelmed by the amount of water it's trying to move. While a reserve pump can be a lifesaver (literally) if a flood takes place, it also means a bit of extra maintenance and repair. Backup sump pump installation costs between $1,000 to $4,500.
Unit costs are pricey, but remodeling-savvy homeowners can cut down on the cost of labor by doing a DIY install. This Old House has an excellent instructional video that will teach how to install a battery-operated backup sump pump.
Final Thoughts on Repair Costs

Your home’s sump pump is its first line of defense against rainwater and floods. That’s why it’s essential to keep your sump pump in good shape and to have professional repairs done when necessary. Although the cost of repairs can be a little pricey, they’re certainly cheaper than remodeling a flooded basement.
In this article, we looked at the average price of repair service as well as the many factors that influence what you’ll end up paying to have your pump fixed. From the type of repairs to the kind of pump you own and even your geographic location, the final cost is a combination of many factors. Luckily, by knowing a few key pieces of information about your sump pump and your home, you can get an idea of how much your sump repairs cost.
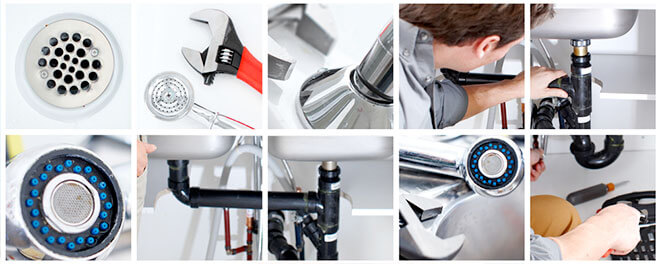
Plumbing Issues – What Diy Can Fix and What Professionals Can Resolve
Water is a natural resource that is not only life-saving but also destructive. This is the reason why you should take the plumbing services seriously. You have to be aware of when you can repair a plumbing issue on your own or when you to contact a plumbing professional.
Let’s see what plumbing issues can you handle on your own-
- Dripping faucet- A constant dripping sound can be very irritating when you are trying to sleep after a very hectic and tiring day. One of the reasons for this dripping can be that the water needs to be replaced in the faucet. You can repair it in simple steps. First, stop the water supply to the faucet and open the handle. See the O-ring and washer for any issues. Replace the washer if necessary. If the dripping still does not stop, the issue might be any broken or loose parts. In such a case you might need a professional faucet repair to fix any leakage or broken ceramic plate.
 Running toilet- If the water continues to flow even after then flush, this means that the lever in the tank behind the bowl has issues. Remove the toilet tank lid, locate the chain at the tank bottom and reattach it to the lever on the toilet handle. If the condition worsens, you may have to replace the chain completely.
 - Clogged drain- Instead of using a chemical drain cleaner, use a natural alternative first like baking soda, salt, and hot water. Some clogs may be too deep and out of reach or might be quite large. In that a case, you might need the help of a good drain cleaning service.
- Trickling shower head- If your shower head starts spraying water in every direction randomly, there might be limescale built on your shower head and spray plate. Remove both the shower head and spray plate. Soak them for a while in a solution that can remove any scaling.
- Garbage disposal- Garbage disposal can stop working just at any time. Try to reset it with the reset button that is given at the bottom. If this trick does not work use an Allen key manually. This will dislodge the clog from your disposal. If the leak still doesn’t stop or the disposal does not work. Contact a professional for garbage disposal repair.
Now take a look at the plumbing issues that only a professional can resolve
- Water heater not working- If your water heater is not heating water properly or making strange sounds, it’s time to call a professional water heater repair service. A faulty water heater can be a serious safety and health hazard. Doherty Plumbing has experts that can repair your gas, electric or tankless water heaters.
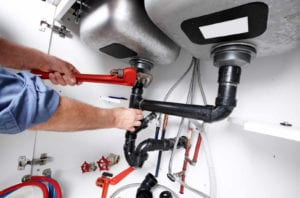
- Fault in Sump pump- A sump pump can protect you from high water level in the case of heavy rains or snowfall. A sump pump failure can cause basement flooding leading to expensive water damage repairs. You should get your sump pump regularly serviced. We can help you professional and affordable sump pump repair services.
- Pipes bursting- Severe temperature changes can cause water pipes to burst that can cause huge flooding in your home. In case of a pipe burst, turn off the main water valve immediately and call a professional plumbing service.
- Clogging in sewer lines- The main point of plumbing in your home is the main sewer line. Any collapse in your sewer line or any clogging can be efficiently handled by a professional plumbing service. Doherty Plumbings have all the latest necessary tools to find and fix issues in your sewer line.
Furthermore, for any emergency plumbing issues, just give us a call or contact us online and we will make sure that your plumbing issue is fixed as soon as possible.